I think you’re gonna love eating these San Francisco Chicken Wings and love serving them even more – coz you’re gonna get compliments! And don’t we cooks all live for that! It’s proof we’re making people happy!

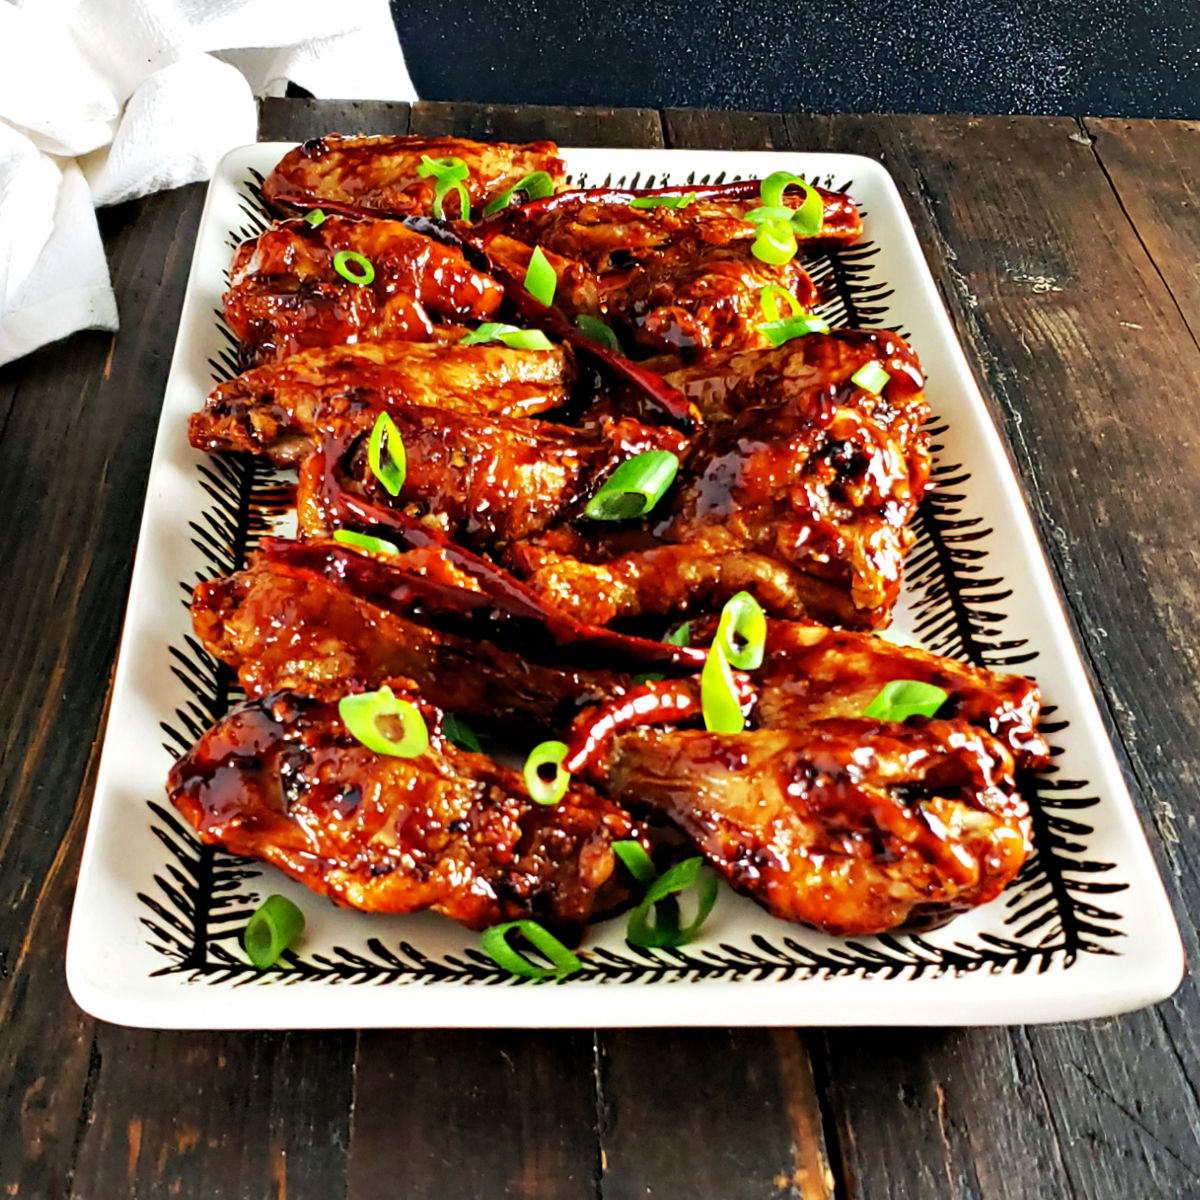
San Francisco Chicken Wings

As far as the name, I’m no expert on every style of wing out there (that’s my son, Kraig’s job), but I do know that San Fran has many variations of these chicken wings. These wings have a sweet, hot, sticky Asian forward coating over the perfect, crunchy, tender wing!
About San Francisco Chicken Wings:
How good are these wings? I confess I am not a huge wing person, but when I took the photos I literally stood there munching on those wings! I didn’t bother to sit down. I didn’t carry them off to the table or the couch or anywhere else. I was just rooted to the spot and I could hardly stop myself!
Everything about these wings is compelling and they have that certain sumpin’ sumpin’ that just makes you want to have one and then another and then another! If you’re serving these for a get-together or a party, or maybe for the game this Sunday, make extra! Like a lot more than you’ll think you and your guests will ever go through. I don’t care if you’re rooting for the San Francisco 49ers or the Philadelphia Eagles, ya gotta make these – and if not for the game any old time will do!!
Be warned though, these are a little sticky so make sure to have napkins or better yet, wipes on hand. These days we can’t just go around licking our fingers even if they are finger-licking good.

First Air Dry, then Marinade, then Coat & let sit b/4 cooking
Making San Francisco Chicken Wings:
Making these wings is a several-step process, and that’s just what makes them so good. There’s really no getting around some fiddling and waiting time if you want these beauties to be all they can be.
- Step 1: Give the wings some time to air dry in the fridge, especially if they’ve been frozen and are giving off lots of chicken juices. Place them on a wire rack, loosely covered with a piece of parchment or foil (basically, just set the parchment or foil on top, don’t seal it to the pan or rack), place the rack over a sheet tray to catch any drips and let them sit for as long as 24 hours and at least several hours in the fridge.
- Step 2: Season the wings with salt and pepper. Let them sit on the rack for about an hour, refrigerated.
- Step 3: Coat the wings with rice flour or a mix of rice flour and cornstarch, or potato starch. Add the wings to a large Ziploc or paper bag. Dump in a total of 1/4 cup of any of the above and shake. Put them back on the rack and let them sit in the fridge for another half hour.
- Step 4: Start your sauce, so you have time to fiddle with cooking the wings; you’ll finish the sauce (which is just heating it a bit more to thicken it) when the wings are finished.
- Step 5: Cook your wings, in the oven under the broiler, in the air fryer, or deep fry in oil. All of these methods will yield a crispy wing.
- Step 6: Sauce your wings! Finish heating the sauce. The sauce is thick and sticky and should adhere nicely without having to place the wings in the oven or air fryer again. It’s best to place the wings in a bowl and drizzle the sauce over them, tossing and turning them as needed to coat.
- Step 6: Try to restrain yourself from eating most of them before company arrives and serve! A sprinkle of green onions is nice as a garnish.
Just so you know, this recipe is super easy to double or more. The sauce may need to be cooked just a bit longer if you do increase the recipe.


Making Substitutes if Needed:
I know the recipe has a long list of ingredients! It is so worth it, or this recipe wouldn’t be here on my site. That being said, substitutions may be helpful. There might be a slight alteration in the taste, but the substitutions below have worked well for me in the past with other recipes even tho I haven’t specifically tested them in this recipe.
- Ginger: Try using about 1 1/4 teaspoon ground. Use this only in a pinch.
- Chili pods: This is an iffy sub to get the same amount of heat, but try about 1/2 teaspoon red pepper flakes.
- Star anise: A pinch of 5 spice powder.
- Rice Vinegar: White wine vinegar will be ok in a pinch in the same amount. Rice vinegar is best here.
- Mirin: Dry sherry in the same amount is a good sub.
- Brown sugar & honey: All brown sugar or all honey will work but will alter the amount of sweetness; corn syrup will work as well.
Storing and Reheating San Francisco Chicken Wings:
These wings are at their best first time around. If you need to store them, place them in a container (don’t cover) and place in the fridge. After they cool, cover them and store for three to four days.
To reheat, your best bet is the microwave, heating on a low setting until just warm. The texture will suffer a bit but they will still taste delicious. Reheating in the oven or air fryer makes the wings too dry.
If you want to make it ahead, earlier in the day, cook your wings then reheat and sauce them before serving. They can sit out ready to serve and be fine – just be aware of food safety.
Saving Money:
Wings can be pricey little devils, so it pays to shop around and buy on sale, and you’re going to find them at rock-bottom prices right before just about any holiday. Stock up and toss in your freezer! There are so many ways to buy wings that a while back I put together a post on Wing Prices – Comparing Options.
If you are into buying wings on the cheap, stocking up, and freezing, you’ll often find them on sale during big holidays, especially those that have football games scheduled and right before the Super Bowl. I have posts on what to look for on sale during most of the holidays Win at the Grocers (scroll to the bottom of the page for links to each holiday) and a special post, Super Bowl Savings. And yeah, the Superbowl is a major food holiday!
If you’re curious about how much it costs to run a freezer, the average is about $4.99 a month. Less than the cost of a Big Mac. Just sayin’. You might want to peek at my articles on Banking Your Food and Freezer Options.
I hope you guys all love these wings as much as I do! Take your time and they’ll really be spectacular! If ya gotta cheat on that time, they’ll still be really good, though, just so you know!
Enjoy! Make lots and lots! Serve them to all your friends & use them to make more friends! 🙂
Mollie

San Francisco Chicken Wings Ready to Eat!
San Francisco Chicken Wings

- Prep Time: overnight
- Cook Time: 1 1/2 hours
- Total Time: 0 hours
- Yield: 17 wings 1x
- Category: appetizer
Ingredients
Marinade the wings in salt & pepper:
- 2 1/4 pounds wings (about 17)
- 1 teaspoon salt
- 1/4 teaspoon pepper
Coat wings:
- Use either 1/4 cup rice flour, 1/4 cup of a mix of rice flour and cornstarch or 1/4 cup of potato starch
Cook wings:
- Neutral oil, preferably vegetable oil or another oil that will withstand high temperatures. Use or 1 to 2 tablespoons oil for air frying (1 tablespoon per batch) 2 to 3 tablespoons for broiling, or enough oil for deep frying.
The sauce:
- 1 tablespoon oil
- 6 cloves minced garlic
- ginger – use a knob about 2″ long and 1/2 ” wide in several thin slices
- 6 dried chile pods
- 1 orange (use peel in several pieces and reserve juice for next step)
- 1 star anise
- 6 tablespoons soy sauce (1/4 cup plus 2 tablespoons)
- reserved juice from orange
- 3 tablespoons rice vinegar
- 2 tablespoons mirin
- 1/4 cup brown sugar
- 2 tablespoons honey
- 1 green onion, thinly sliced for garnish
- garlic chili paste or chili crisp, optional, for more heat
Instructions
Note: the sauce is made in a two-part process. It is prepared and partially cooked initially prior to the wings cooking and then when the wings are done, reheated to thicken more. For the crispiest wings with a dry, yet still sticky coating, hot wings should be combined with hot sauce.
Marinade the wings in salt & pepper:
Toss wings with salt and pepper and let sit on rack for one hour, refrigerated, uncovered.
Coat wings:
Add wings to a large Ziploc or a paper bag, add in the coating of choice and shake. Lay back out on rack and allow to sit for 30 minutes (up to an hour is fine) in the fridge, uncovered. If broiling wings, save the bag.
Cook wings:
- Air Fry: Add wings to air fryer, sprinkle with 1 tablespoon oil. Work in batches in a single layer for best results. Air Crisp for 24 minutes, turning once, but do consult your manual on timing and temperature.
- Broil: Toss wings back into bag, drizzle with oil and shake. Lay out on rack over a sheet tray and broil about 6 to 8 inches from broiler for a total of about 25 minutes, rearranging and turning as needed, until wings are cooked through and browned.
- Deep fry: Heat oil in large pot to 350 degrees F. Add wings, working in batches as needed, and deep fry for about 14 minutes, until cooked through. Drain on a paper bag for the crispiest wings.
Place wings in a pan or heat-proof bowl while sauce finishes.
The Sauce:
Add oil to a medium-sized skillet and heat over medium-high heat. Add the garlic and saute until fragrant, about a minute. Reduce heat to medium and add the ginger, chile pods, orange peel, and star anise and stir. Fry for a minute or two then add soy sauce, brown sugar, honey, rice vinegar, reserved orange juice and mirin.
Bring to a boil and boil for two minutes, stirring constantly. Turn off heat and remove pan from burner.
When wings are finished cooking, turn heat back up on the sauce to medium-high and bring sauce to a boil. Quickly boil, whisking, until the sauce bubbles and the whisk leaves a line that stays distinct for just a few seconds when scraped across the bottom of the pan. Remove from heat and drizzle sauce over wings, tossing and turning with tongs to coat. Remove wings to serving platter.
Garnish with green onion.

8 thoughts on “San Francisco Chicken Wings”