Are you looking for a burger that’s going to wow your loved ones and friends? Something special? Something for a summer holiday, maybe? Father’s Day? This is the burger you want. Beer Can Burgers make any cookout an extravaganza.

Mushroom, caramelized onion and Swiss Beer Can Burgers

I thought the burgers were cooked with the beer can inside, like the Beer Can Chicken. Not! They are traditionally formed around a beer can and filled with (your choice) awesome deliciousness. My hints are going to be a big help, but know these are big, they’re fancy, cooked low and slow, and they’ll take a little longer than your average burger.
About Beer Can Burgers:
Beer Can Burgers are a bacon-wrapped (the bacon helps it hold together) “cup” of ground beef with a customized filling. They’re grilled (or smoked or baked) low and slow. The bacon renders and caramelizes, and the beef is flavored by both the bacon and your filling. What emerges is magical. It gives Juicy Lucy vibes, but more complex. And of course, there’s bacon.
Beer Can Burgers can be filled with almost anything as long as it’s cheesy or precooked and can withstand the slow process of cooking the burgers. So, for instance, you won’t want to toss raw onions inside the Beer Can Burgers. But you can toss in caramelized onions. This Steakhouse Mushroom and Swiss Beer Can Burger has mushrooms and caramelized onions. Pepper Jack cheese and my Pickled Jalapenos fill my Jalapeno Pepper Jack Beer Can Burgers.
But you can go for cooked (or caramelized, maybe with a shot of whiskey or a drizzle of beer) onions, peppers, mushrooms, and so on. How about one filled with Texas Chili and Cheese? Maybe a Philly Cheesesteak filling would be more your thing? Maybe Smoked and Pulled Pork? An Italian Caprese filling would be great. Just think of how good a breakfast combo would be for brunch. Filled with sausage, hash browns, cheese, and topped with an egg in the last 20 minutes of cooking. What favorite filling will you dream up?
If your filling isn’t already moist, add a bit of barbecue sauce. It really helps break up a cheesier filling. The Jalapeno Pepperjack filling was great with my Pride of Deercamp Barbecue Sauce, and I always have a jug in my fridge and think everyone should. Shameless plug, there!! Just look how frosty that is in the photo! You can see it was a hot, humid day when I made these!

Beer Can Burgers – that’s my Pride of Deer Camp Barbecue Sauce upper left.
Making Beer Can Burgers:
When making Beer Can Burgers, let gluttony or good taste prevail! They’re your burgers, after all. Your choice! Do use an 80/20 or 75/25 beef for this, and make sure it’s cold so it can be worked with and doesn’t get tough. You’ll also want to use a standard, not thick-cut bacon. Bonus for cheaper, on both counts, the fattier ground beef and the thinner bacon, right?
I know this is beer can burgers, but I found when testing that a bottle works better. The diameter is just right, so the bacon wraps perfectly without stretching. And it’s easier to slide out of the ground beef “cup.” Plus, even using a bottle, these are huge. So use a bottle – the recipe is formulated for just this size.
And you don’t have to use beer. I used a Not Your Father’s Root Beer. And yes, I did toss some of the root beer in my mushrooms – insanely good! Spur of the moment with an ingredient on hand is how some of my favorite recipes have come about. I bet a little beer would be good, too.

Beer Can Burgers
Shaping Beer Can Burgers – Size Matters!
The thing about Beer Can Burgers is that they really have to be big. I tried a smaller one (with one layer of bacon) and as it cooked, the burger shrunk and the filling spilled out. What a mess. So you really want to go with a large burger with two rows of bacon.
So we’re talking about at least 8 ounces of beef per burger but 10 ounces is so much better. Using 8 ounces was just a little skimpy. 10 ounces was the perfect amount of burger around the edges and on the bottom, and reaches about 3 1/4 to 3 1/2″ up the bottle. That’s the perfect height for the two rows of bacon.
The only problem? I had to call in help to finish my burger, although it was so good almost made it! Chance gave me a hand. Gotta love a Labrador. They’ll eat anything. You could, of course, share one between two people. The recipe is formulated to make one to four burgers.

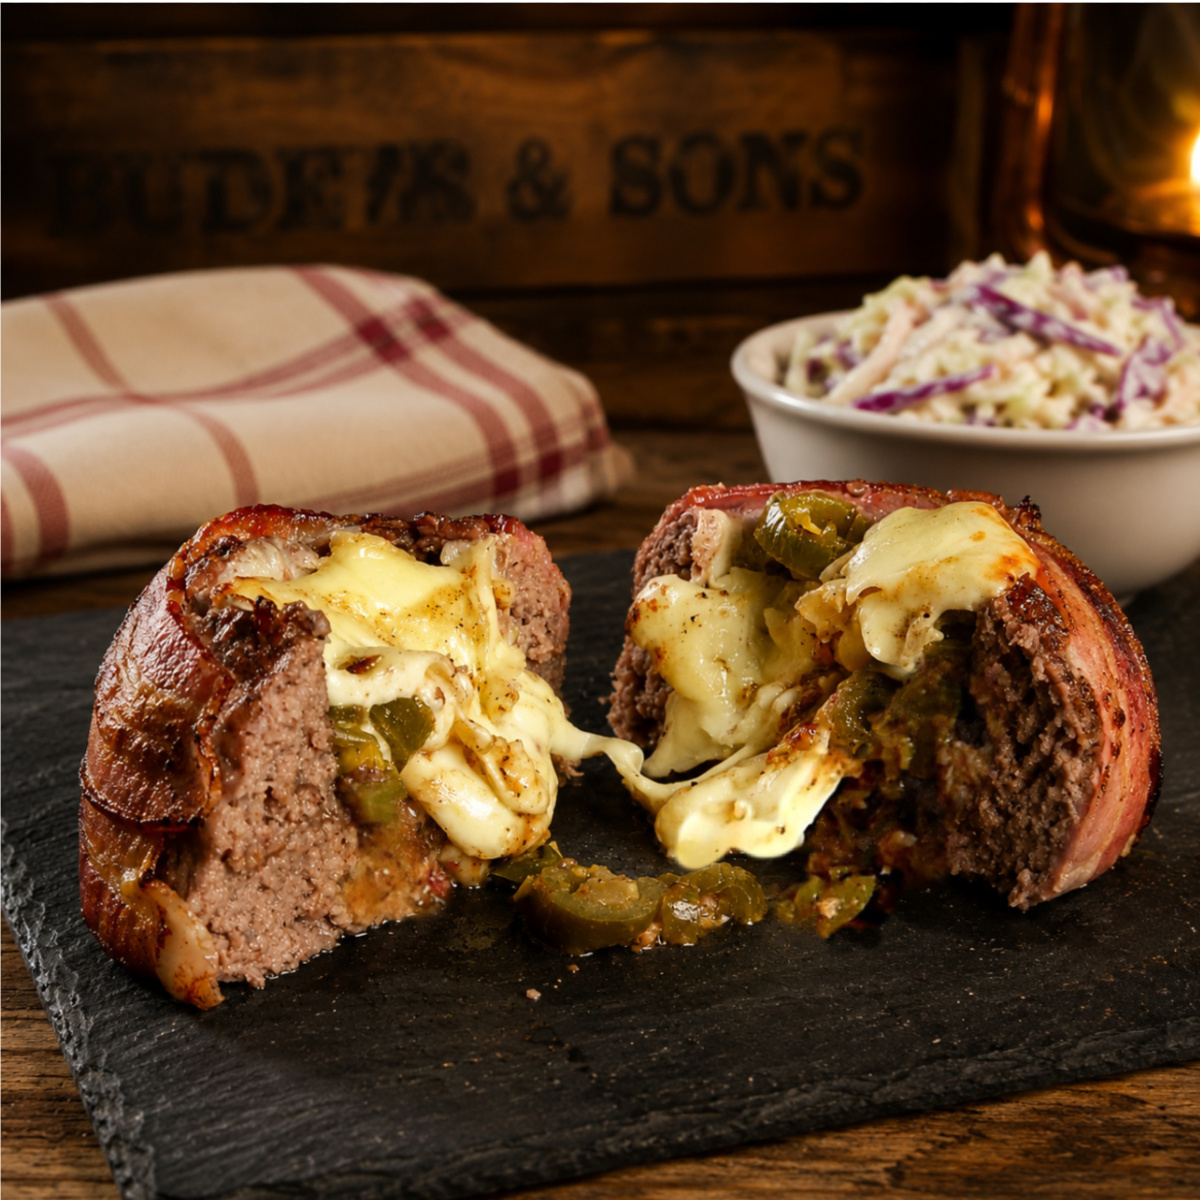
Beer Can Burgers – Jalapeno Pepper Jack
Cooking Beer Can Burgers:
Beer Can Burgers can be baked in the oven or done on a grill, gas or charcoal, and since you’re going to be cooking them low and slow (shoot for about 300 degrees), add some wood chips if you’d like.
You’re looking for indirect heat on the burgers, and they are going to take some time. About 50 minutes to an hour. Using a thermometer is a bit tough since these are filled, and you don’t want to do a lot of poking, and it’s hard to test in the “meat” area. Test one in the center of the burger and pull your burgers about 5 degrees less than your desired doneness.
Here is how to set up your grill for Indirect Heat.
You don’t want to fuss with the burgers too much, and for goodness’ sake, try not to move them – you’ll risk damaging the bottom of the burgers and possible leakage! Maybe towards the very end, when the bottom is cooked and firm, you could gently turn the burgers to make sure all the bacon is browned and crispy.

Finishing Beer Can Burgers:
Rather than trying to move the burgers around, if any portions wrapped in bacon aren’t perfect, and this is optional:
- I pull out my trusty blow torch. It might seem a little over the top, but it’s the easiest way to finish any spots of bacon that aren’t quite cooked to perfection. And an $18.00 torch from the hardware store torch works far better than any pricy one from a cooking store. (Plus you can fix your copper pipes and make Creme Brulee!)
- Just run the flame carefully over those areas until the bacon is crisp and browned. Keep the torch moving and don’t get too close, though. Leave the flame in one place too long, and the bacon can take on a propane taste, and nobody wants that.
Once your burgers are done, let them sit for a few minutes. Just long enough so that the burgers and cheese firm up a smidge and the burger won’t lose all its juiciness. And remember, molten cheese needs a few minutes, just for safety reasons.
Serving Beer Can Burgers:
I’ve seen these served on buns, but I don’t know how that could be managed. You’d have to have big buns! No jokes, please! But if I’ve put a certain song in your head, I apologize in advance. And of course, these are going to be low carb, right?
Any of your standard sides is appropriate. Probably nothing cheesy. Tailor your sides to your burger.
- Something a little crunchy is nice. Salad, Cole Slaw, Potato Salad, I considered my Parmesan Crostini with my Caramelized Onion Mushroom Burger – not to serve on, but serve with.
- And of course, you’re going to want fries, tater tots, or anything along that line. Because what’s a cookout without?
- You won’t need much for extra toppings. Maybe a little salsa or extra pickled jalapenos for the Jalapeno Cheese version.
And enjoy. These are just insanely good! Maybe I should say Enjoy Responsibly!

Beer Can Burgers
Beer Can Burgers

Only the most AWESOME way to make burgers, ever! Stuffed with your favorite fillings, wrapped in bacon and slowly cooked to perfection.
- Prep Time: 20 minutes
- Cook Time: 50 minutes
- Total Time: 1 hour 10 minutes
- Yield: 1 to 4 1x
- Category: main dish beef
- Cuisine: American
Ingredients
- 10 ounces ground beef per person (2 1/2 pounds for four)
- 2 slices thin cut bacon per person (1/2 package/pound for four)
- salt & pepper or favorite seasoning
- Desired fillings, about 1/2 cup per burger (2 cups for four)
- Cheese, 2 ounces cut in cubes or shredded per person (8 ounces for four)
Instructions
Set up grill for Indirect Heat. (See the PDF linked in the article under Cooking Beer Can Burgers, except you’ll aim for a temperature of 300 degrees. Smoking is optional.) Alternatively, set a wire rack over a rimmed, foil-lined baking sheet and preheat oven to 300 degrees.
Form burgers into a ball. Place on cutting board and using a beer bottle (preferably) or a can press down firmly. With your hands, form beef around the bottle to a height of about 3 1/4 to 3 1/2 inches. Wrap horizontally, two slices of bacon, one to the bottom of the beef, the next just above. Carefully remove bottle and season with salt, pepper or desired seasoning.
Fill burgers with desired fillings and cook for about 50 minutes for medium. Testing by thermometer tends to be problematic. I’d suggest pulling burgers about five degrees earlier than the guide below indicates. Rarer burgers will not fully cook the bacon.
- rare: 125 degrees (dark purple-red, just warm, tender)
- medium rare: 135 degrees (bright purple-red, warm, tender, very juicy)
- medium: 145 degrees (rich pink, yielding, slightly tender, juicy)
- medium well: 155 degrees (tan with slight pink, firm, some juice)
- well: 160 (tan to brown, no pink, chewy, little if any juice)

I’m posting Beer Can Burgers at Fiesta Friday #230 co hosted by Diann @ Of Goats and Greens.
27 thoughts on “Beer Can Burgers”