I love, love, love to make this homemade Best Turkey Broth (and use the same recipe for Chicken broth, although it makes less). This is made from the bones left from cooking a whole chicken. If you have a ham bone leftover from your cooking, see my sister post on Ham Stock, Instant Pot or Stovetop.

Best chicken or turkey stock

I’ve made stock or broth since I was a kid! I stopped. Life felt too chaotic, and I lost the habit. A trip to my daughter’s (I guess I set one example, lol) made me see what I’d been missing. And so I’m at it again.
Just hit the jump to the recipe button right above and go for it if you want, but if you’re hungry for more and want to know all about turkey (or chicken) stock, the best way to make it, and how to use it, then read on, friend!
About Best Turkey Broth or Chicken Broth:
Making your scratch Broth or Stock is easy, a little messy, and takes time…mostly hands off. It requires a few steps, very few ingredients, and can be made from what most toss away: bones and scraps of vegetables.
I can never make enough stock for every recipe I make, but I whip up a batch whenever I have turkey or chicken bones so I can use it, at least, in my soups and special recipes – that’s where this Best Turkey Broth or Chicken Broth is going to shine.
Two of my favorite soups where the stock really matters are Homemade Chicken (or Turkey) Noodle Soup and Pho Ga, Vietnamese Noodle Soup.
Is it Broth, Stock, or Bone Broth:
The terms broth and stock were often used interchangeably in past years; currently, “stock” is usually associated with bones as the base, while “broth” is lighter and associated with “meat”.
The term bone broth is just stock, but the name comes from the Asian side of cooking. The term has caught on in the US, especially with the Paleo movement.
Blonde or Brown Stock:
This recipe is a “white” or a “blonde” stock, even though it’s not really either white or blonde.
To make this a “brown” stock, crank your oven to 450 degrees F. Put bones on a sheet pan (optional: add large chunks of vegetables) and place in oven. Roast until dark, turning once, almost to the edge of too done. Toss all in the stock pot and, using water, deglaze the sheet pan, scraping up every bit of dark and/or gelatinous sticky stuff and crispy bits, and pour it into your stock pot.
Flavor of Best Turkey Broth or Chicken Broth:
Although a blonde stock, there’s no lack of flavor. It comes from meat left on the bones, the bones themself, collagen, and marrow, the aromatics (vegetables), as well as the herbs and spices added to the recipe. That’s all classic.
If you’ve cooked your turkey or chicken with flavorful liquid, rubs, or spices, some of that flavor will pass into your stock, both from any meat and skin clinging to the bones, and if you use them, the juices & drippings, skin attached to the carcass, and scraps from the initial cooking of the poultry. (Don’t worry about using anything fatty; the fat will be skimmed at the end.)
For the most part, I use every bit of the chicken or turkey I can, and roll with and appreciate all the subtle flavor nuances. Sometimes, I might lean into a stock rich with specific flavors and use it to make specific soup recipes.
An example: the stock from Sunday Roast Chicken (Lemon & Garlic variation) is fabulous in Chicken & Rice Soup, which already has lemon and it complements the flavors in Italian Wedding Soup, too.
The Vegetables (Aromatics):
The classic combination of vegetables is onion, carrot, and celery. You can dice up your fresh vegetables and add. Wash everything first, don’t peel, and use the skins, stems, and roots whenever possible.
I find the best stock is made from scraps of vegetables left from cooking. It saves a little money, but there is an incredible payoff in flavor.
- If you’re preparing a lot of vegetables (for instance, a holiday feast), save all those scraps for the stock.
- If you’re going to make soup with this stock later, prepare the vegetables for the soup when making the stock and use the scraps in addition to those in the recipe, below.
- If you plan ahead, on an ongoing basis, save the vegetable scraps when cooking. Keep in a ziploc bag in the freezer and add to it until there’s enough for stock.
For the scrap bag, use onion skins and ends, peels and ends of carrots, and the ends (if you can clean them) and leaves of celery.
- Onions: There’s always onion left behind when dicing for a recipe, save that as well as the skins. The skins give a beautiful color to the stock.
- Carrots: Add flavor and color. Wash before peeling for other recipes and add those peelings, along with the top ends.
- Celery: leaves are often the first to go when a package is in the fridge. Before that happens, chop them off, rinse, slice, and toss them in your freezer bag.
All those tiny bits and pieces from scraps not only give so much flavor (much more than a few vegetables) but they’ll float across the top of the stock like a raft, eliminating the need for skimming.

Onion, Carrot, Celery – save for soup; it makes a raft & flavors & clarifies the stock
Herbs:
I never make stock without adding a few herbs, almost always parsley, sometimes marjoram or thyme.
If I have fresh parsley, that’s great, but I usually save at least some of the stems throughout the summer as I cook and toss them in the freezer in a ziploc.
Skimming:
While some recommend skimming soup as it simmers, if using all the ends, pieces, and peelings (as discussed above), it’s unnecessary. The vegetable matter floats to the top and makes a “raft”. As the stock percolates through the vegetable matter, it naturally clarifies the soup, trapping any grey foam. Skim off the whole works before straining the soup.
If just adding a few vegetables, you will want to skim off any grey foam as it accumulates; the heavier vegetables mostly sink to the bottom of the pot, so they operate differently.
After the stock is strained and it settles as it cools, the fat will float to the top. It can be skimmed off while the stock is warm, but it’s easier to consider this a two-day project. Refrigerate overnight and remove the fat after it’s hardened or congealed. Pick up in pieces, or if softer, scrape across it with a spoon.
About the Gel:
This stock has a deep, rich color and a good “gel” once cooled. It comes from the long, slow cooking that coaxes the collagen and marrow from the bones. Avoid boiling the stock.
The gel is the hallmark of the best stocks & broths, so don’t be surprised when your stock looks like jello. It liquifies once warmed. Adding a hint of acid helps extract the collagen, see below under Acidic Ingredients.
If your stock does not gel, either there isn’t enough collagen in the bones, not enough collagen was extracted, it was cooked at the wrong temperature (usually too hot – don’t boil), or there is too much water was added.
What to do with the Fat Skimmed from the Stock:
The fat removed from the stock is sometimes called Schmaltz. It can be saved in the fridge for about two weeks or in the freezer for months. To freeze, when cold, add to a ziploc, push it down to the bottom, and roll it up.
Cook with it! It’s fabulous. It’s traditionally used to make Latkes, but it can also be used instead of duck fat for frying potatoes.
The Meat from the Poultry:
If you’re frugal, cut as much off the carcass as possible for other uses. You’ll never remove it all, and it is surprising how much is left.
After the carcass has simmered for an hour, any meat still clinging to the bones softens and is easy to remove. Even scrappy pieces, those discolored or attached to cartilage, are transformed by the gentle simmer and are now usable.
If you wish, remove the bones and pick off the remainder of that meat before it spends too much time in the stock. A chicken yields enough for a soup, and a turkey, more. Use it for soups, see Soups, Chowders & Chilis, or one of These Recipes. Toss the bones back in to continue to simmer.
Secret Ingredients:
- Marjoram: While it isn’t an herb often used in the US, it is magical with chicken or turkey. Some compare to oregano, but there is a decided difference. Thyme is also often added to stock.
- Turnip Rutabaga or Parsnip: (Ina Garten used to use a rutabaga in her stock; these days I’ve seen her recipes call for parsnip.) Either will need to be peeled; they’re usually covered in wax. If the turnip or rutabaga is large, use just a piece of it.
- Fried Chicken: A surprise secret ingredient is a small piece of fried chicken. I know it’s crazy, but I tossed in a wing once – the result was nuanced, but magical. Now, I keep a couple of wings in the freezer just for stock. Don’t go overboard with this!
Acidic Ingredients:
A newer trick to me was to add a bit of acid to my stock pot. It doesn’t take much, and there shouldn’t be enough to “skew” the taste, but it helps extract the collagen, and a little acid enhances the flavor.
For every six to eight quarts:
- Vinegar: try a tablespoon or two of a mild vinegar, like white wine) Or just a tablespoon of stronger, like apple cider.
- Lemon juice: While lemon can be added, use just a tablespoon, or the flavor will be distinct.
- Wine: a cup of white wine will do the trick; the type isn’t particular. Leftover is fine. Old leftover is fine, even if you wouldn’t drink it.
Food Safety For Best Turkey Broth or Chicken Broth:
First of all, an important safety note. Hot stock on the counter or the fridge is a breeding ground for bacteria.
- Do not place a large stockpot full of stock directly in the fridge.
- Divide into several shallow containers (metal if possible because it will cool faster).
- After it has cooled to just warm, place it in the fridge.
- Leave the lid slightly ajar until it reaches refrigerator temperature.
- Always be aware of the amount of time and the 2-hour safety window.
- As much as possible, keep stock out of the “danger” zone, 40 degrees F. to 140 degrees F.
Store stock for three or four days in the fridge. If necessary to store longer, bring it back to a boil, and it will buy more time.
Freezing does not destroy pathogens. It holds any that are in your stock in near-suspended animation. As soon as the temperature is right, they will multiply like rabbits.

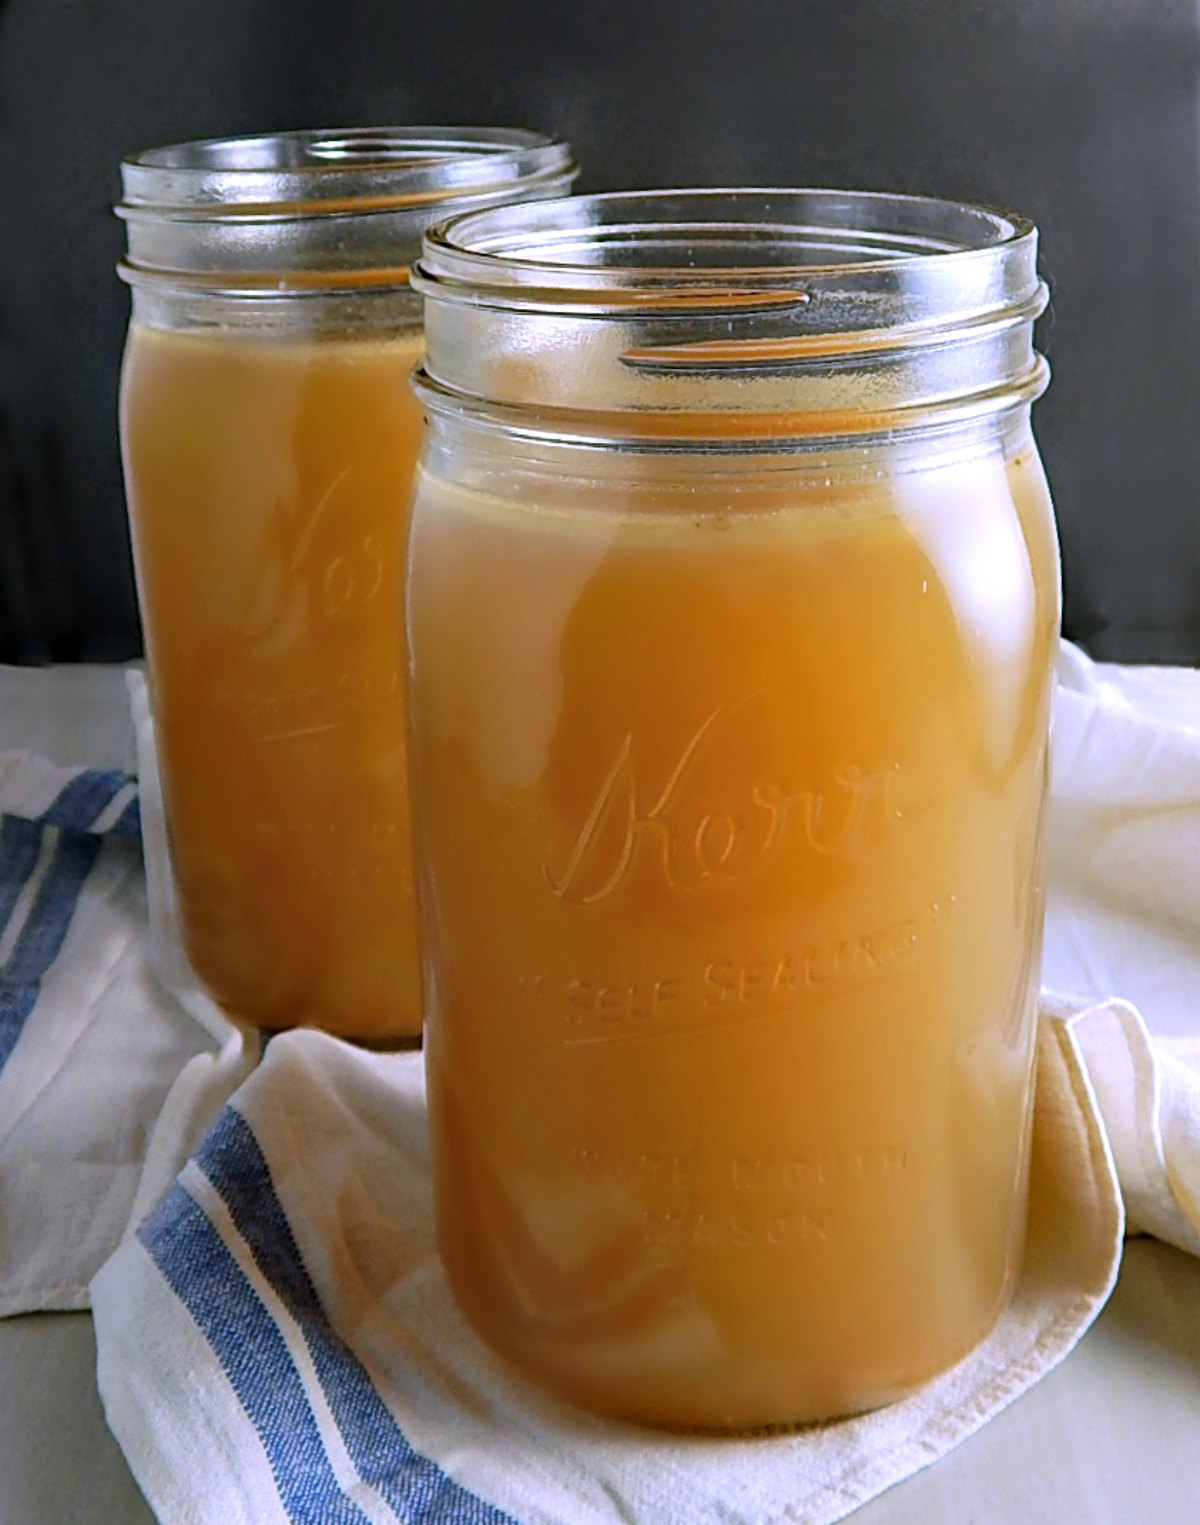
Best Turkey Broth or Chicken Broth
My Method of Freezing:
This recipe, when using a turkey carcass, will make about 4 quarts, and using a chicken carcass, just a bit less. That can vary. The intensity varies, too. First, adjust to taste. If too strong, add water & if too weak, simmer longer.
Next, measure the stock. Maybe there are lines in your bowl or pot? From here, decide how you wish to freeze. I always freeze in ziplocs and label them before adding any liquid.
Stock can be frozen as is, in ziplocs, in quantities you might use for soups or favorite recipes. Lay the ziplocs flat on a sheet pan until frozen, then stack as you wish, vertically or horizontally.
Stock can be reduced and then placed in quart freezer bags. Generally, I will reduce a quart to a cup, add to the labeled ziploc, then fold in half and freeze. I keep them vertically in a container.
Now here’s your word problem, measuring equivalents are below:
- Reduce the stock enough so that 1 quart (4 cups) is reduced to one cup.
- However many quarts there are (no need to be exact), reduce to that many cups. If there are five quarts, reduce to five cups, and so on.
- Place each cup in a labeled ziplock.
- To bring that cup back to its original volume, 1 quart, once thawed, add three cups of water.
- You’ll see I have labeled my Ziploc “Chicken Stock Add 3 cups water = 1 quart”

Making Soup from the Stock:
Some soup recipes start with making the stock with a whole chicken or chicken parts. For instance, many Chicken and Dumpling recipes. Usually, you’re directed to add the chicken to the pot with any aromatics and cover it by one inch with water. That will vary a lot, but usually it’s around 10 to 12 cups (3 quarts).
The more frugal way to stretch the chicken or turkey for those recipes is to make up your big pot of stock, then use the 3 quarts of that stock (and a good amount of the chicken or turkey if using) in these kinds of recipes.
Other recipes call for a set measurement of stock, somewhere from six cups (1 1/2 quarts) and up to 12 cups (3 quarts). Some recipes are adapted to use the amount of stock you get from a can (15 ounces, almost 2 cups) or a box (32 ounces, 4 cups).
Thaw out the amount of stock you need, add the water if you’ve reduced it, and if there’s excess, place it in a fresh Ziploc, labeled with the amount left, and refreeze. It’s perfectly safe to refreeze stock. Use that when you need a small amount, or combine several that have accumulated.
If you have standard recipes you make all the time, measure the Best Turkey Broth or Chicken Broth in the amount needed before freezing, and make sure to label the amount and what recipe it’s for.
If you’re reducing for a specific recipe, the math can be harder, but it doesn’t need to be exact. I measured 6 cups (1 1/2 quarts) for my Chicken Tortilla Soup, so if I’ve reduced each quart to a cup, I need 1 1/2 cups of the reduced broth & a note to add in the 4 1/2 cups water to make 6 cups.

Chicken Tortilla Soup
Saving Money on Groceries:
Making stock from bones is a flex, especially making a rich, long-simmered stock and dividing it up for more than one soup or other recipes. You’ll save money, but more importantly, compared to buying, the flavor is incredible, and there are no strange food additives.
In addition to the stock, if the bones are removed and stripped, there will be the byproduct of turkey or chicken meat. When the fat is removed, there is schmalz to cook with.
While using vegetable scraps in the soup, you do save some money, but more importantly, you don’t waste flavor! The quality of stock made with scraps is outstanding.
Helpful Hints:
- How long should I simmer stock? As long as possible, within reason. A minimum of two to three hours and up to six.
- What is a low simmer when making stock? A low simmer will mean a few bubbles percolating away at any one time; bring the stock to a boil and immediately adjust to a simmer. A very brothy stock just takes an hour or two.
- Why didn’t my stock gel? Either the bones don’t have enough collagen (which isn’t the case with a turkey or chicken carcass), too much water (either initially or it wasn’t reduced enough), or the wrong cooking temperature, usually too hot.
- How can I manage making stock? Make it a two-day process. Simmer, skin, and strain, then refrigerate. It’s easy to remove the fat once cold. Bones can be picked on the first day or saved to deal with the next.
- What do I do with everything left after making stock? It’s going to be a mix of vegetable matter and bones. Don’t compost or use the garbage disposal. Dispose of in such a way that animals can’t get to it or be harmed.

Best Turkey Broth or Chicken Broth
Best Turkey Broth or Chicken Broth

- Total Time: hours - varies
- Yield: 3 to 5 quarts 1x
- Category: Soup
- Cuisine: American
Ingredients
- 1 turkey carcass (12 to 14 pounds) break into pieces to fit pot
- water to cover by 2 inches
- 1 large onion, chunked (do not peel)
- 1 large carrot, chunked (do not peel)
- 1 stalk celery, chopped
- 2 tablespoons white vinegar or lemon juice, or one to two cups white wine
- 10 black peppercorns
- several sprigs parsley or stems
Notes:
If using larger carcass, increase other ingredients proportionately, but still use water to cover by 2 inches.
Replace vegetables with 1 quart freezer bag filled with onion, carrot, and celery trimmings and peelings.
Instructions
Bring all ingredients except parsley to a boil in a 12-quart stockpot over medium-high heat, then immediately turn down to a bare simmer. Continue to simmer, uncovered, for at least two to three hours and up to six or longer; for the right simmer, look for a few bubbles to slowly rise to the surface every now and then.
If you have used the vegetable trimmings (see note) instead of or in addition to whole veggies, there will be no need to skim the broth. If not, skim any foam as it rises to the surface.
If there is a lot of meat left on the carcass, pull bones out as soon as the meat has softened enough to easily remove from the bones, usually about 45 minutes to an hour into the cooking process. Remove the meat and refrigerate it. Replace the bones and continue to simmer for another hour and up to five.
Add parsley about two hours before you plan to stop cooking, then continue to simmer till stock is rich and flavorful. When finished, skim any vegetable matter from the top of the stock, then strain stock. Cool stock about 20 minutes, skim fat from surface, or divide up into containers and cool, then skim fat after it has hardened on the surface.
Note on straining: pressing hard on solids when straining will result in a cloudy stock; some feel it’s more flavorful. It’s your call. Some strain through a colander, but for very clear stock, strain twice. The second time, line with an old cotton towel or paper towels. If there is residue in the pot left when the stock has been reduced, it’s concentrated flavor. Use a little of the strained stock to melt it off if possible, then add back to the stock.
Use as a base for soup or portion and freeze.
Notes:
- There is no salt in this broth, add to taste when finished.
- Using vegetable trimmings: save up the trimmings from any carrots, celery, and onion (skins and all) and use them to make a “raft” across the top of the soup. They will naturally clarify the soup.
- Watch the soup for liquid level, especially when simmering a long time.
- Safety: If you make large amounts of stock, cool it quickly by putting in smaller containers, cool on the counter to warm, then place in the fridge, uncovered, until chilled. Metal bowls help the heat dissipate faster.
- Broth keeps well for about three to four days. If you haven’t used it or frozen it by then and it still seems fresh, bring it to a rolling boil before using.
Helpful Links
If you came to this recipe looking for a way to use leftover turkey or chicken, be sure to check out the link below for 12 Days of Turkey. You might want to see the sister post for 12 Days of Ham, too.


9 thoughts on “Best Turkey Broth or Chicken Broth”