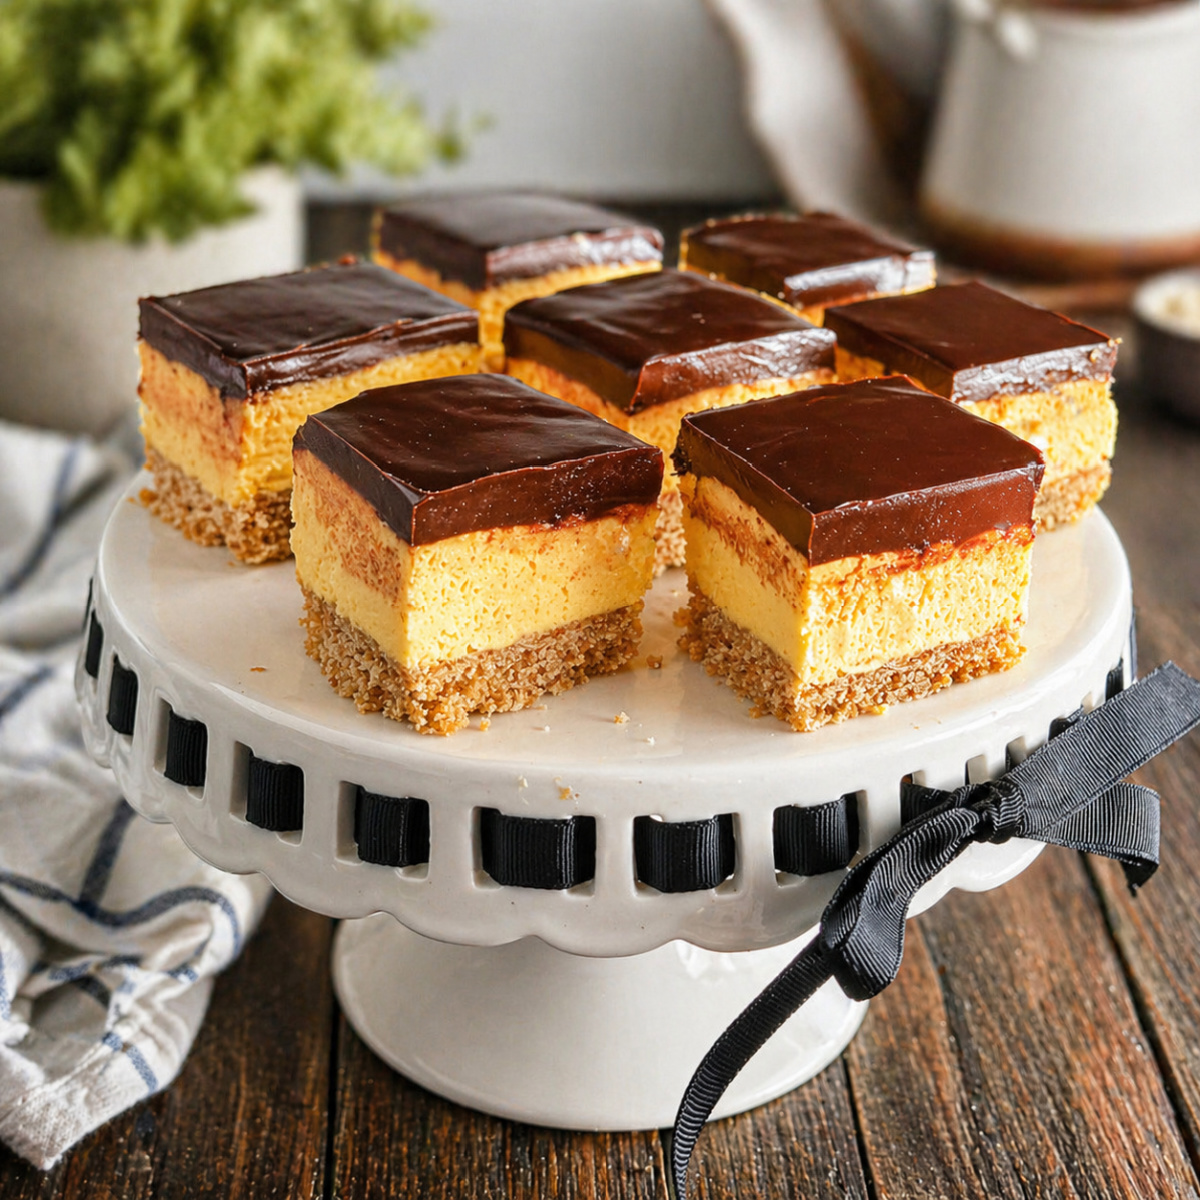

Do you love Boston Cream Pie as much as me? Then you might love these super-easy Boston Cream Pie Bars even more. Because they’re so low effort, you can get your “fix” almost any time.

Boston Cream Pie Bars

I love the idea of serving these for a game day party, and they’d be a great treat for the Super Bowl this year, with a nod to the New England Patriots (after all, I posted a Seattle recipe last week, so equal time and all!) These are all the goodness of Boston Cream Pie, but so much easier.
About Boston Cream Pie Bars:
These No-Bake Boston Cream Pie Bars start with a cookie crust to stand in for the cake in a classic Boston Cream Pie. It’s topped with a layer of sturdy instant pudding mix up. That’s followed by a rich chocolate ganache that sets into a glossy finish.
The process itself is simple. The tough part is giving them enough time to chill so each layer firms up just right. I may be making these in February, but they’re the kind of no-bake dessert that works just as well any time of year.
Just a note: This is a fun bar, and a great solution for a get-together. Do they stand up to a made from scratch Boston Cream Pie side by side? In my mind, nothing can! So expectations need to be kept in check:
Serving:
These are super rich, very sweet, and a little soft and gooey after they’re out of the fridge for even a few minutes. They’re best cut small and served with a plate and a fork.
Just a note: the crust will easily slide across a plate, and there will be crumbs, so a rimmed plate is best.

Boston Cream Pie Bars
Making Boston Cream Pie Bars:
Boston Cream Pie Bars are super easy, but pay close attention to these hints for success.
- The chilling time in each step is essential. Don’t rush them.
- Press the crust firmly and evenly before freezing. An evenly pressed crust will cut cleaner without crumbling.
- Do not start the custard mixture until the base has been frozen for at least 12 minutes.
- Make sure the cream is cold when beating it into the pudding mix, and start slowly. Add about 1/3 of the cream, mix, then slowly, while still mixing, pour in the rest.
- Try adding the pudding mix in even dollops to the crust, then smooth it out while pressing down. Pay attention to the corners. The back of a metal spoon works better than a spatula.
- Once all the pudding is in and as level as possible, heat the back of a spoon under hot water from the faucet, dry, and give the pudding one final smooth.
- For nice, clean cuts, use a parchment-lined pan. Either run the knife under hot water (or place it in a glass of hot water), dry it, and make a cut, then wipe it clean and repeat.

this is the texture you want
About the Cookie Base:
- As long as it’s measured by the ounce, different cookies may be used instead of the Nilla Wafers.
- If using different cookies, after mixing with the butter, the base should hold together if squeezed; if it’s too wet, add a few more crumbs. If too dry and crumbly, add a bit more butter. The finished texture might be slightly different.
- Other candidates might be shortbread cookies, Biscoff cookies, or Graham Crackers. Basically, any plain”dry” cookies should work.

When compressed, it should hold together.
About the Ganache:
- This easy ganache is based on semi-sweet chocolate chips. It’s easy to substitute different flavors as long as they are standard size. If semi-sweet isn’t a favorite, you might enjoy milk or dark chocolate.
- If the chips are not standard or are using bar chocolate, go by weight. A cup of standard-sized chocolate chips weighs about six ounces, so substitute with the same amount of any other chocolate.
- The ganache is made by pouring the hot cream over the chocolate. After letting it sit for a minute or two, stir. It will take a bit, maybe two minutes or so, but eventually the light color will darken, and the ganache will thicken.
- If the ganache is too thin after cooling three to five minutes, cool it a bit longer or place the bowl over a double boiler and add a few extra chocolate chips. If it’s too thick to pour, either gently warm it or add a little extra cream by the tablespoon.
Can Boston Cream Bars be Made Ahead?
- Boston Cream Pie bars can be stored in the refrigerator for up to three days with no noticeable deterioration in texture.
- This has to be made ahead and chilled for at least two hours before serving, so it’s ideal to make earlier in the day or the evening before
What Kind of Pudding Do I Use?
- Use Instant Pudding, a 3.4 -ounce box. The word “instant” might be very small, so pay attention. You don’t want “cook & serve.”
- Either Vanilla or French Vanilla will be fine in this recipe. The French Vanilla is what I used, and it’s a little more yellow.
- I have not tested using a homemade version of pudding mix or made it with homemade pastry cream. Let me know how it works if you have. I would suspect pastry cream would be far too delicate.
Other Bars You Might Like:
Best Easy S’more Bars – my son recommends popping one of these in the microwave! (He also taught me the same trick for packaged store-bought chocolate chip cookies!)

Best Easy S’more Bars
Dulce de Leche Cheesecake Bars – always a top-rated recipe on my site.

Dulce de Leche Cheesecake Bars
Ultimate Hershey’s Double Chocolate Brownies – My personal favorite! They won me a proposal once…I suspected he was more in love with my brownies than with me.

Hershey’s Ultimate Double Chocolate Brownie
Saving Money on Groceries:
What you pay for groceries depends on not just WHERE you shop, but WHEN. Be strategic and stock up at rock-bottom prices.
- The best sales are before holidays; check out Win at the Grocers. Think beyond the occasion & use the opportunity to stock up at a low for the coming weeks to months.
- If available, take advantage of discount stores like Aldi or Lidl. The pricing at Buyer’s clubs is not always the lowest, but can trump in quality. Be selective when shopping there.
The minute I saw these bars, I knew I HAD to make them. But remember: Need is expensive. Patience is cheap. Valentine’s Day was just around the corner, so I waited it out for a week.
Not because these bars are a Valentine’s dessert, but because I knew the holiday sales would work in my favor. The pudding, heavy cream, and vanilla wafers were all likely to be discounted. As a bonus, I picked up extra bags of chocolate chips on sale to replace the ones I used and replenish my pantry.
I didn’t go overboard, though, on those chocolate chips. Valentine’s sales are good, but Easter, and then the summer holiday baking (and grilling) sales aren’t far behind. There’s no need to buy a year’s worth when another opportunity to save is coming soon.
Chocolate Chips & Other Baking Chips
Chocolate prices have risen dramatically, but like most baking ingredients, there’s still a best time to buy.
- Stock up during the Summer Holiday sales, when prices are usually at their lowest. The Winter Holiday pricing is almost as good. Sales are still decent before Valentine’s Day and Easter.
- If you use a bag for a recipe during one of these sale periods, consider replacing it while prices are still low. That’s how you avoid paying full price the next time a cookie craving strikes.
- Be cautious with off-brands; sometimes the savings come at the expense of quality. Buyers’ clubs can be an excellent source for premium brands at very competitive prices.
Cream:
- Cream is always cheaper at discount groceries like Aldi & Lidl. Their everyday price beats out the buyer’s club and the best grocery store holiday sales price.
- Cream keeps for weeks, so if the standard grocery is the only option, get in the habit of picking up at a low price before holidays.
Nilla Wafers:
- Are a Nabisco product. Look for them on sale before holidays or grouped with sales for other popular Nabisco products (such as buy so many, pay so much). If not on sale, compare pricing; it varies quite a bit between stores.
- Aldi and Lidl both have store brands at about a third of the cost of name-brand cookies.
Pudding Mix:
- Dry pudding mix does go on sale now and then, often not advertised. Prices vary a lot between stores. If you use it, be sure to stock up if you see it at a low.
- Lidl doesn’t currently carry it, but Aldi has a store brand. I have yet to try it.
These Boston Cream Pie Bars may not be the “real deal,” but they’re so delish and are so easy. Maybe this is one for your tweens and/or teens to whip up. Enjoy!
Mollie

Boston Cream Pie Bars
Boston Cream Pie Bars

An easy no-bake recipe that will satisfy your craving for Boston Cream Pie!
- Prep Time: 15 minutes active
- Total Time: 2 1/2 hours
- Yield: 12 bars 1x
- Category: Dessert Bar
- Cuisine: American
Ingredients
For the Base:
- 6 ounces Nilla wafer cookies (about 50 regular or 109 mini)
- 2 tablespoons granulated or brown sugar
- 6 tablespoons (2/3 of a stick) melted butter
For the Filling:
- 2 packages (3.4 ounce boxes) instant vanilla pudding mix
- 2 1/2 cups cold cream
- 1 teaspoon vanilla (optional)
For the Easy Ganache:
- 1 cup semi-sweet chocolate chips
- 2/3 cup hot (but not boiling) heavy cream
Instructions
Prepare the base:
- In a food processor, pulse the Nilla wafers until finely ground; add the sugar and butter and pulse several times until well mixed and the crumbs are evenly moistened.
- Alternatively: Place cookies in a large, heavy ziploc bag. With a rolling pin (or other heavy object), crush the cookies. Add the sugar and butter, and shake and massage until the crumbs are evenly moistened.
- Another option: Crush the cookies in a blender; don’t mix in the sugar and butter in the blender (it’s too hard to remove), but instead add the crumbs to a bowl and mix the sugar and butter in by hand.
Place the crumbs in the bottom of an 8×8″ pan lined with parchment paper (for easy removal), and press into an even layer. (A dry measuring cup works well for this, but pay attention to the corners.)
Freeze the crust for 15 minutes.
Make the Filling:
Once the crust has been in the freezer for about 12 minutes, add a teaspoon of vanilla to the cream if using. In a large bowl, add the pudding. Pour about 1/3 of the cream in, beating on low with an electric beater. While still beating, slowly pour in the remainder of the cream until the mixture has thickened. This process takes about 1 1/2 minutes.
Spread the pudding mixture over the chilled crust layer in an even layer. Place in the refrigerator for at least 10 to 15 minutes before adding ganache.
Prepare the ganache:
Place the chocolate chips in a heatproof bowl. Bring the cream to just a simmer (small bubbles around the edge of the pan). Do not boil.
Immediately pour the hot cream over the chocolate chips. Allow to sit for a minute, then gently whisk the chocolate and cream together until smooth. It may take a minute or two. Keep stirring and make sure all the chocolate is up from the bottom. You’ll see it go from a barely tinted color to a rich brown.
Allow the ganache to cool and thicken for about 3 to 5 minutes for a smooth topping, or a little more to make decorative swoops.
Chill the bars:
Chill for at least 2 hours before serving; overnight will give cleaner cuts. Refrigerate for up to three days, tightly covered.
Boston Cream Pie Bars
5 thoughts on “Boston Cream Pie Bars”