I don’t know if I’ve ever told you guys my dirty little secret. It’s true – I am a fiend for potstickers. I’m the problem, it’s me! I am especially a fiend for my Pork and Scallion Potstickers. (Beware: long post below!)

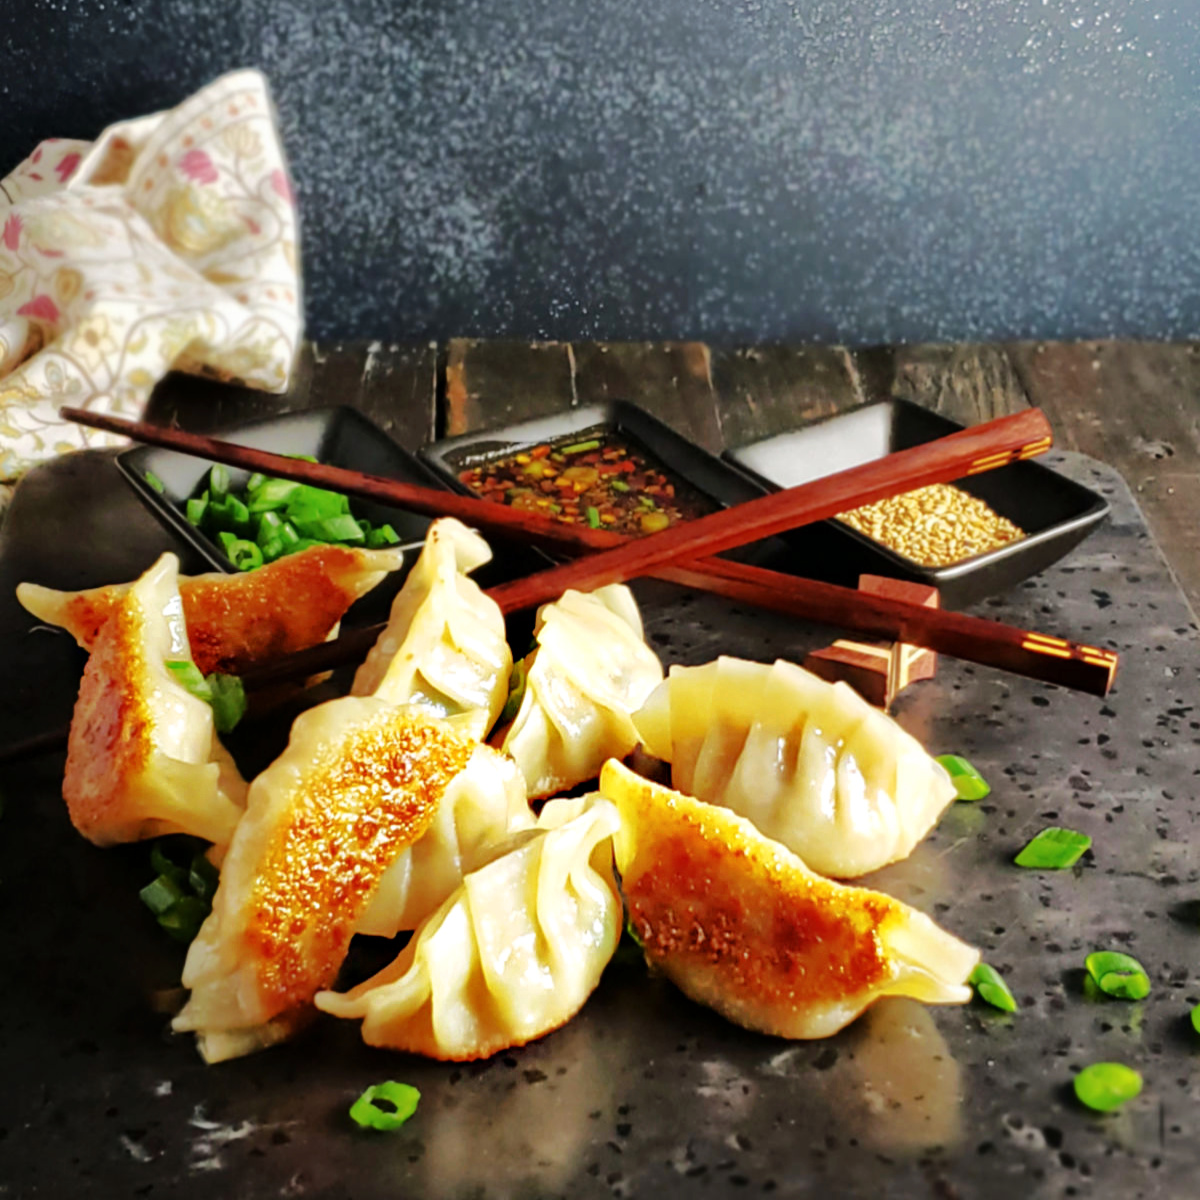
Pork and Scallion Potstickers

The trouble with potstickers is they’re pricey in restaurants, and the frozen ones from the grocery are a crapshoot. You never know how they’ll taste, but usually not as good as you’d hoped. If you can relate, this is the recipe that will cure all.
About Pork and Scallion Potstickers:
Know that making any potsticker is an epic flex, but you’re gonna rule when you serve these! The flavor is outstanding, the texture perfect, and the dipping sauce? The bomb. I’m not gonna lie; they’re a piece of work (heck, can you believe the same thing has been said of me, now and then!) but they’re so worth it!
I know there are, somewhere, peeps that have never had a potsticker, so I’m gonna back up to the basics, here. Potstickers are little dumplings. Small round wrappers are filled with a savory filling and crimped.
They are pan-fried to get a crunchy golden crust on the bottom: Add potstickers to a hot, oiled pan, pour in a little water, then pop the lid on. The dumplings cook through with the resulting steam. The lid is taken off, and the potstickers are done when the water evaporates, and they release from the pan. Place a plate over the pan, turn it over, and the potstickers drop out.
What you get in a dumpling is just a bite or two of something so stunning it should never be taken for granted! The top of the dumpling is soft and luscious, the bottom, golden brown and crunchy with a bit of chewy crispiness. If you’re a “texture” person like me, pure heaven.

Pork and Scallion Potstickers
About the Filling for Pork and Scallion Potstickers:
I would be happy even if that was all there was to a potsticker – but wait, there’s more! Each dumpling is going to give you a pop of concentrated flavor. Enclosed in that lovely little package is the filling; in this case, a tender little nugget of luscious ground pork mixed with scallions and cabbage, with classic Asian flavors. There’s soy and garlic and ginger and rice vinegar with just a touch of sugar. Shhh, that last is a secret!
Right away, you have savory umami contrasting against a slightly sweet and sour taste that’s the hallmark of many Asian dishes. Sesame oil now comes in with its own indescribable smokiness, and a touch of white pepper gives a back note of spice.
It’s a good thing to know that fattier ground pork is going to make the best dumpling, so this isn’t the place to get all virtuous with anything less.

Pork and Scallion Potstickers
What to Serve with Potstickers:
Serve your potstickers with a dipping sauce, and my Favorite Asian Dipping Sauce echoes a lot of the flavors and uses many of the same ingredients already in these potstickers. That takes those flavors over the top and beyond!
And just in case you’re not like me and you don’t consider potstickers to be a full meal, they go well as an appetizer to just about any Asian or Asian-leaning meal. The Kitchn has a great post on different ways to incorporate potstickers into a meal!
Even more recently, I’ve seen bloggers either serving potstickers in a spicy/savory sauce, baked in a casserole in the oven, or as a main component of soup. (You might want to shape them like a wonton for these recipes, as long as you’re making them.)

My Favorite Asian Dipping Sauce
Making Pork and Scallion Potstickers:
My solution to getting enough potstickers is to make them at home! I usually make a lot – this recipe is for a reasonable amount, about 25 to 30, but can be doubled or tripled from my recipe printout, below.
Potstickers are really not that complicated to make as long as you’re using prepared wrappers. The filling is usually just mixing together a few ingredients. (Sometimes I shortcut the recipe by making my Asian Dipping Sauce, above, and using it about 2 1/2 tablespoons instead of measuring out the flavoring ingredients.)
The first time you make potstickers, try frying up a teaspoon of the filling and giving it a taste test; then it will be easy to make any adjustments in flavor to suit your tastes, before you fill, fold, and pleat your batch.
It’s the folding and pleating that can take some practice. Depending on how your hands work, it can be a little easier for some than for others. Once you’ve made them a few times, you’ll develop a little “muscle memory” and get much quicker.


Helpful Hints!
I’m going to copy some of the notes from the Reuben Potstickers (yeah, I really went there!) I made back in 2015 – now there’s a recipe that could use a new photo!!
- First of all, if you’ve never made potstickers, don’t be intimidated, and don’t worry about perfection. The more you make, the better you get.
- Be patient. When I started, it took me a couple of batches to get it down; it took my son’s g/f three potstickers! How easy it is depends on how nimble your fingers are.
- The first few will be a bit slow, but then you’ll pick up speed, and in no time you’ll be crimping like a pro.
- Crimping from one side to another takes a little longer to master, but is much quicker than going from the center out to each side.
- Make it fun! Put everything on a big cookie sheet & carry it into the living room and watch a show; make them with friends or family.
- Use a little teaspoon scoop if you have one – it makes it so much easier to fill than a spoon does.
- If you don’t feel like crimping a fancy potsticker, though, fold them in half and seal them. They’ll still taste delicious!
Below are old photos of making potstickers from the Reuben Potsticker post. You can see it can get a little messy! Being organized helps so much.
The Set Up for Making Potstickers:
It really helps to have a good setup when making any Potsticker. Using a couple of good-sized sheet trays makes them portable – you might not want to stand at the kitchen counter while making these.
I use two trays, one to put my filling, a container of water to wet the potsticker skin, a small scoop, and a damp towel to cover the stack of potsticker skins. The second sheet tray is dusted lightly with cornstarch (tap any excess out in the sink or trash) and has a damp towel to cover the finished potstickers.

Pork and Scallion Potstickers
Storing and Reheating Pork and Scallion Potstickers:
Uncooked Potstickers can be stored in the refrigerator, tightly covered, before cooking (but it’s not ideal; they can dry out) for a day or two.
They freeze beautifully, so that’s a better option. Place the potstickers in a single layer, not touching each other, on a sheet tray lined with wax or parchment paper and freeze. Once frozen, place in Ziploc bags and to protect the potstickers, place the bag(s) in a sturdy container.
Do not thaw; heat from frozen using the same method as below, but add two minutes to the steaming process. Watch the water level and the bottoms of the potstickers!
Place already cooked leftover potstickers in an airtight container in the fridge for up to three to five days. Reheat by placing on a plate. Cover loosely with a damp paper towel. Microwave for a minute and check to see if they’re hot; add additional time if needed.

Just look at that gorgeous bottom!
Saving Money on the Groceries:
All of the items in these potstickers can be had for the lowest price at an Asian market. If you’re not buying there, check out the prices at your grocery. If these ingredients are ones you use often, it pays to stock up on them right before the Chinese New Year. They are likely to be at a low in your grocery whether advertised or not.
Ground Pork:
- Often difficult to find (check the fresh meat aisle and the frozen foods) and pricey when it’s available.
- If you can’t get it, don’t want to pay so much, or want the freshest ground pork, just buy shoulder, chunk it up, first removing hard fat and silverskin, and pulse it in your food processor. Pulsing is easiest when the pork is very cold. Portion the rest of the shoulder out (they’re usually large) for other recipes.
- You’re always going to save money if you buy pork shoulder on a deep sale, break it down (see my post on Large Pork Roasts), and have usable sizes in your freezer.
I hope I’ve covered everything you need to know about making potstickers, and I hope you enjoy making (and eating) these pork and scallion Potstickers with your friends and family! Until next time,
Mollie

Pork and Scallion Potstickers
Pork and Scallion Potstickers

- Prep Time: 50 minutes
- Cook Time: 5 to 6 minutes
- Total Time: 1 hour
- Yield: 25 to 30 1x
- Category: Appetizer
- Cuisine: Asian
Ingredients
- 1 cup finely shredded cabbage, about 1/4 of a small head
- 1 tablespoon salt
- 8 ounces ground pork (fattier is best)
- 1/2 cup finely sliced young scallions (about 8)
- 1 tablespoon soy sauce
- 1 teaspoon grated ginger
- 1 clove garlic, peeled and grated
- 1 teaspoon sesame oil
- 1 teaspoon rice wine vinegar
- 1/2 teaspoon sugar
- 1/8 teaspoon white pepper
- 1 package of potsticker wrappers (about 25 – 30)
Instructions
To Make Filling:
Place cabbage in a small strainer set over a bowl. Salt liberally and toss. Leave for at least 10 minutes (15 is better), then rinse and drain. Place cabbage in a small pile in the middle of a clean towel and roll towel closed. Grab each end of the towel and twist to squeeze the moisture out of the cabbage.
While the cabbage sits with the salt, prepare the rest of the filling. Add pork and scallions to small bowl. Sprinkle with soy, ginger, garlic, sesame oil, rice wine vinegar., sugar, and white pepper.
Once the cabbage has been squeezed, add to bowl. Using chopsticks or working gently with fingertips, combine all ingredients together.
To Fill and Fold:
Ready your filling, a small cup or bowl of water, a couple of clean kitchen towels, slightly dampened, and the skins (wrappers.) Sprinkle a plate or a sheet tray with a little cornstarch. This is easily done by adding a teaspoon or so of cornstarch to a sieve and sprinkling over the surface. Tap out any excess cornstarch.
Work with six wrappers at a time, covering the remainder of them with a damp towel. Pick up a wrapper, place it in your left (or non dominant) hand, across the top of your palm and bottom of your fingers. Use a finger dipped in water to run a bead of moisture around the outside of edge of the wrapper. Add a scant teaspoon of filling, then fold in half, from the edge closest to your palm to the edge closest to your fingers. Make certain it meets in the middle, but don’t press down yet.
You’ll use your left thumb, right thumb, and index fingers to pleat and seal. Make the first pleat on the left side of the wrapper. Continue to shift and pleat, pressing each pleat to the back side of the dumpling wrapper as you go. Ensure that no small pieces of filling are sticking up where the potsticker is sealed. Shift a bit and tap the filling down if necessary.
Eight pleats are said to be an auspicious number, but make as few or as many as desired. As each potsticker is done, place on prepared tray by rows. As you place the dumplings, feel free to very lightly press so the bottom is flat and gently press the top into a curved shape, making sure the seals are tight. When six are done, cover with a damp towel and move on to the next six.
To Cook:
Heat a large nonstick pan with 1 tablespoon of cooking oil over medium heat. When the oil is warm, add the dumplings, flat side down, to the pan. If working with a large batch, start at the center, and place in concentric circles as quickly as possible. If they’ve been sitting on cornstarch, brush any excess off before starting to fry. That little bit of cornstarch has a purpose; it prevents sticking to the tray and helps the bottom fry up beautifully.
Let fry for 1 minute until the bottoms are just light golden brown. You may need to shift the pan slightly from side to side on the burner to make certain all the dumplings brown at the same time. Pour 1/3 cup of water (or broth) into the pan and immediately cover with a tight-fitting lid. Turn heat to medium and let the dumplings steam for 3 minutes.
Open the lid and let any remaining liquid cook off (about 1 minute). Check to see if the bottoms are crispy and golden brown, and all potstickers have loosened from the steaming. If not, cook longer if necessary or if any are stuck, carefully loosen with a thin spatula. Place a large plate over the pan, and carefully flip the whole works. If any are remaining in the pan, remove them.
To keep the bottom crisp, turn any potstickers resting on the bottom to their side.
To cook more, quickly wipe pan clean and repeat.

12 thoughts on “Pork and Scallion Potstickers”