
Rumtopf is one of Germany’s most beloved traditional preserves – a process in which gorgeous seasonal fruit slowly infuses rum, creating a richly flavored holiday liqueur while preserving the fruit for later enjoyment.
If you’ve searched for Rumtopf before, you’ve probably noticed that many recipes focus on just one or two parts of the tradition. My self-appointed job is to hold your hand through the entire process, from the first fruit of the season to the first taste during the holiday season.

This guide follows the traditional method from the first strawberries of late spring through the final fruits of autumn, with detailed instructions, fruit-by-fruit recommendations, Rumtopf troubleshooting tips, serving ideas, and traditional variations. Whether you’re making your first Rumtopf or your tenth, you’ll find everything you need in one place.
The name simply means “rum pot,” but don’t let the simple translation fool you. As fruits come into season, they’re added one by one. Each contributes its own flavor while the earlier fruit quietly matures, and by autumn, you’ve created something far greater than the sum of its parts.
Some families finish their Rumtopf with warming spices or other traditional additions before sealing the crock for its final rest. After the last fruit is added, the Rumtopf is left to mature until Advent, typically late November or early December, when it’s traditionally opened for the first taste of the Christmas season.
The best Rumtopf begins with the best fruit, so whenever possible, start with fruit that’s at the peak of its season. But don’t let a later start discourage you. Every batch is a little different, and even if you begin after the earliest fruits have gone out of season, you’ll still create a wonderful Rumtopf and, perhaps, a holiday tradition of your own.
My German ancestors are probably shaking their heads, but with today’s year-round availability of fruit, it’s entirely possible to shortcut tradition and make Rumtopf all at once. You’ll miss the anticipation, some of the tradition, a bit of the changing textures, and some of the layered flavor that develops as the fruit is added throughout the season.

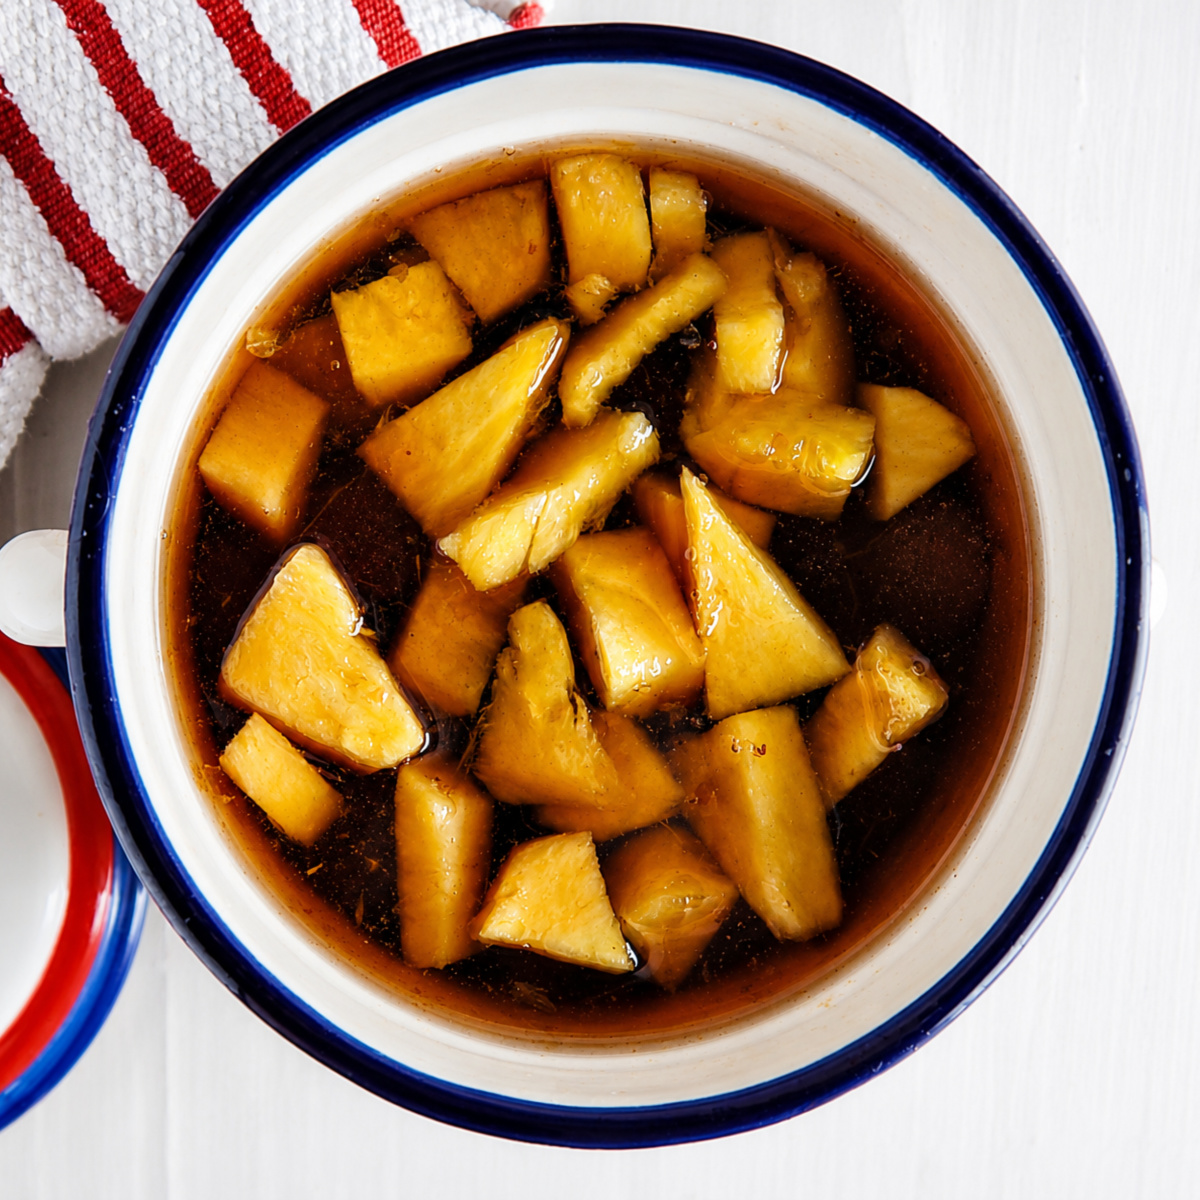
Just opened the Rumtopf – that’s the pineapple layer showing.
Choosing the Right Rumtopf Container
One of the nice things about Rumtopf is that you don’t need a special crock to make it.
Traditional ceramic Rumtopf crocks are wonderful if you have one, and they’re easy to find, both new and secondhand. I was lucky enough to find mine in a thrift store.
If you’re shopping for a crock, look for one that’s food-safe and, ideally, has a fairly wide opening. Very old, decorative, or crocks with small cracks in the glazing may not be suitable for long-term food storage.
A wide mouth makes it easier to add fruit throughout the season and gives you more options if you choose to use a small plate to keep the fruit submerged.
Don’t have a Rumtopf crock? Don’t worry.
A large glass jar, cookie jar, pickle jar (as long as there is no smell of pickles or vinegar), or any other food-safe container with a tight-fitting lid works just as well. If you’re using a clear glass container, store it in a dark place or cover it to keep the contents out of direct light.
If your lid doesn’t seal tightly, place a layer of plastic wrap over the opening before securing the lid. Containers without lids can be covered tightly with plastic wrap, followed by a layer of heavy-duty aluminum foil.

My Rumtopf pot
What Size Container?
Almost any size will work.
Most home Rumtopf crocks hold between 5 quarts and 5 gallons, but you can make much smaller batches, too. Half-pint or pint jars are popular for gifts or when making Rumtopf with just one or two fruits.
Choose a container that’s large enough to accommodate the fruit you plan to add throughout the season. Keep in mind that a taller, narrower container will need a little less alcohol to cover the fruit than a wider one.
Keeping the Fruit Submerged
One of the most important parts of making Rumtopf is keeping all of the fruit completely beneath the surface of the rum. Fruit exposed to air can mold.
Some people use a small plate or saucer as a weight. Over time, the fruit may stain it. Depending on the size of the container and plate, a plate may slip, exposing some of the fruit to air and potential molding. Ask me how I know.
I found an even easier solution. A zip-top bag, larger than your jar diameter, filled about halfway with water and the rest with air floats gently on top of the fruit, holding everything below the surface of the rum. It also slips easily through the narrower neck of many crocks and can’t slide off to the bottom the way a plate sometimes can.


Choosing the Fruit For Rumtopf:
Traditionally, German Rumtopf is made with local, seasonal fruit, added as each fruit reaches its peak. Whether you follow the traditional seasonal approach or adapt it to what’s available where you live, the rule remains the same:
Use only the best fruit.
Choose fruit that’s perfectly ripe, full of flavor, and free from bruises or blemishes. Unless noted otherwise, prepare the fruit as directed and cut larger fruits into bite-sized pieces.
These key fruits form the traditional foundation of a Rumtopf and are included in most German recipes.
- Strawberries
- Cherries
- Peaches
- Apricots
- Pears
- Grapes
Traditionally, Rumtopf is finished with fresh pineapple in the fall. (Canned can be used.)
Other fruits may be added. Think of these as supporting fruits. They add wonderful layers of flavor without overpowering the traditional foundation.
As a general guideline, use about 1 pound (500 grams) of each key fruit and about 4 to 5 ounces (125 grams) of the secondary fruits. Don’t feel obligated to include every fruit; choose the ones you enjoy most while leaving room for the fruits still to come.
A few notes before you begin:
- Many traditional German Rumtopf recipes recommend leaving delicate berries, especially strawberries and raspberries, unwashed before adding them to the crock. The original reason is seldom explained, but you’ll find this recommendation repeated in many traditional sources. If you choose to follow it, use only clean, high-quality fruit from a trusted source. Otherwise, wash the fruit gently and dry it thoroughly before preparing it. Do not soak the fruit.
- Don’t expect the finished Rumtopf to look like a bowl of fresh fruit. As the months pass, the fruit gradually exchanges both color and flavor with the rum and with the other fruits in the crock. By the holidays, the bright individual colors have mellowed into the rich, deep amber tones of a mature Rumtopf, and the fruit has softened. That’s exactly what should happen.
Below you’ll find the fruits in roughly the order they ripen through the season, although the timing will vary depending on your climate.

Add the peels and hulls (but not pits) you’re not using of fruit to a pitcher of water to infuse. Just because they’re not visually appealing doesn’t mean they lack flavor. See Spa Water on a Budget.
Seasonal Fruits for Rumtopf
The fruits below are listed in roughly the order they’re traditionally added to Rumtopf as they come into season. Depending on your climate, your growing season may be earlier or later than the one shown here.
Before adding any fruit, read the next section on layering the fruit with sugar and rum. The layering process is one of the keys to a successful Rumtopf.
An asterisk (*) identifies the traditional foundation fruits used in nearly every Rumtopf.
May & June

If Strawberries are smaller, leave them whole after removing the stems; otherwise, cut them into bite-sized pieces.
Raspberries
- Traditionally left unwashed.
- Leave whole and handle gently.
Strawberries *
- Traditionally left unwashed.
- Remove stems and hulls.
- Leave whole unless larger than bite-sized.
- Hint: Pushing a drinking straw through the bottom to the top of the whole strawberry neatly removed the hull. Gently trim off any white or light green where the hull was removed, if necessary.
July


Apricots *
- Remove pits.
- Peel if desired.
- Cut into bite-sized pieces.
Cherries (Sweet) *
- Remove stems.
- Pitting is optional.
- If left whole, prick each cherry several times with a needle or toothpick so the rum can penetrate.
Currants
- Remove all stems.
Gooseberries
- Remove stems and blossom ends.
Nectarines
- Remove pits.
- Peel if desired. (The peel softens during aging.)
- Cut into bite-sized pieces.
Peaches *
- Remove pits.
- Peel if desired. (The peel softens during aging.)
- Cut into bite-sized pieces.
American Wild Plums
- Remove pits.
- Halve or quarter.
Raspberries
- Traditionally left unwashed.
- Leave whole and handle gently.
August

My friend Rosanne gave me pears from her tree; I’ll sort through them for the Rumpoft.
Sour Cherries *
- Prepare as for sweet cherries above.
Nectarines
- Prepare as above.
Peaches *
- Prepare as above.
Pears *
- Peel, core, and slice.
Yellow & Purple Plums
- Remove pits.
- Halve or quarter.
September

The Plums and Grapes. Don’t forget to pierce the grapes with a needle or toothpick.
Early White & Red Seedless Grapes
- Wash.
- Prick each grape several times with a needle or toothpick.
Pears *
- Peel, core, and slice.
Purple Plums
- Remove pits.
- Halve or quarter.
October

Add as much or as little pineapple as you want – make sure to have something in mind to use the rest.
Late White & Red Seedless Grapes
- Wash.
- Prick each grape several times with a needle or toothpick.
Fall Strawberries *
- Prepare as above.
Pineapple
- Remove rind and core.
- Cut into large cubes.
- Fresh is traditional, but canned pineapple may be substituted.

Raisins are sometimes included in traditional German Rumtopf
Special Additions (Optional)
Many Rumtopf recipes include a few optional additions near the end of the season, typically in late September or October, after most of the fruit has been added. These ingredients add subtle warmth and complexity as the Rumtopf matures for the holidays.
Traditional additions include:
- Cinnamon sticks
- Whole cloves
- Whole allspice berries
- Citrus peel (usually lemon or orange, with as little white pith as possible)
- Star anise
- Raisins
In addition, I’ve found that my Beautiful Dried Oranges lend a light citrus note. Since I often make them in the Holiday season for decorations or potpourri, I’ll sometimes add one or two instead of citrus peel.
There are no hard-and-fast rules for the amounts used, and recipes vary considerably. The goal is to complement the fruit rather than overwhelm it.
For my approximately 2-gallon Rumtopf, I preferred a lighter hand with the spices since I wanted the fruit to remain the star. I used:
- 1 cinnamon stick
- 3 whole allspice berries
- 2 whole cloves
- A couple of strips of orange peel, with the white pith removed
It added just a subtle warmth without making the Rumtopf taste overly spiced. I’ve only used raisins once; they add a rounded sweetness, but I prefer my Rumtopf without. They are a classic German addition; my grandparents settled a small German community in Iowa, and raisins were a staple in many passed-down family recipes. Not in potato salad, though! j/k

Spices for Traditional German Rumtopf – I sometimes use my dried oranges instead of orange peel. Cinnamon, cloves and allspice berries are usually, but not always, added.
Fruits Generally Not Recommended
While Rumtopf is wonderfully adaptable, some fruits simply don’t perform well during the long months of aging. They may become mushy, discolor the Rumtopf, add too much water, or contribute flavors that overpower the finished liqueur.
That doesn’t mean they can never be used. If one is a particular favorite, feel free to experiment with a small batch. Just know that these fruits are generally not recommended in traditional Rumtopf recipes.
Apples
- Tend to turn an unappealing brown color.
- Often develop an undesirable texture during aging.
Bananas
- Become overly soft and mushy.
- Add excess moisture without contributing much flavor.
Blackberries
- Their dark color can overwhelm the appearance of the other fruit.
- Some cooks find they develop a slightly bitter flavor.
Blueberries
- Like blackberries, they darken the Rumtopf considerably.
- Some recipes note that they can become slightly bitter with extended aging.
Citrus Fruits (Oranges, Grapefruit, etc.)
- Can make the Rumtopf overly tart or bitter.
- See Special Additions for the traditional use of citrus peel.
Huckleberries
- Can be used, but their deep color quickly darkens the other fruit.
- If using, add them as soon as possible after picking.
Melons (Including Cantaloupe, Watermelon, and others)
- Contribute too much water.
- Tend to lose both flavor and texture during aging.
Rhubarb
- Can make the Rumtopf overly tart or sour.
- The fibers become more pronounced and unpleasant in the finished product.
Sugar & How to Add the Fruit to Your Rumtopf
The process is essentially the same each time you add fruit throughout the season. The first layer is placed in an empty crock, while later additions are simply layered on top of the fruit already in the pot.
The First Layer
For your first layer, combine equal weights of prepared fruit and sugar (a 1:1 ratio by weight) in a large bowl, mixing well so all of the fruit is evenly coated. So if you’re using 1 pound of prepared fruit, add 1 pound (about 2 1/4 cups) of sugar.
White sugar, brown sugar, or a combination of the two may be used, depending on your preference. Brown sugar should be measured by packing it into the measuring cup.
I’ve found after making rumtopf over the years that plain white sugar lets the flavors of the fruit and rum shine, while brown sugar pairs beautifully with the optional warming spices, such as cinnamon, allspice, cloves, and raisins, for a deeper holiday flavor. It’s your choice.
Allow the fruit and sugar to stand in the bowl for about three hours, until the sugar has dissolved and the fruit has released some of its juices. Then transfer the sugar coated fruit, and juices to your crock. If there is a layer of sugar in the bowl, not yet dissolved, leave it in the bowl and add a little rum to dissolve it. Add that to the crock.
Level the fruit in the crock and pour in enough rum to cover it by about 1 inch (roughly the width of two fingers).
Place your weight, such as a small plate or the previously mentioned zip-top bag half-filled with water, on top of the fruit to keep it completely submerged. Seal the crock tightly and store it in a cool, dark place away from any open flames.
Measuring the Fruit & Sugar
Weighing the prepared fruit and sugar provides the most accurate ratio, but don’t let the lack of a kitchen scale stop you. Rumtopf is wonderfully forgiving. Measuring the prepared fruit and sugar by volume works well, too, and generations of home cooks successfully made Rumtopf long before kitchen scales were commonly available.
You can weigh your fruit on one of the scales in your grocery produce section and add a little extra to compensate for pits and seeds, but a good estimate is fine.
Adding Additional Fruit
As each new fruit comes into season, prepare it as directed, then combine it with sugar and mix gently, but well, so the fruit is evenly coated.
Traditional recipes vary on the amount of sugar to use for later additions. Some continue using equal weights of fruit and sugar (1:1 by weight), while others reduce the sugar to about half the weight of the fruit (2:1 fruit-to-sugar by weight). Both methods are considered traditional.
Allow each new batch of fruit and sugar to macerate in a separate bowl for about three hours before adding it to the crock. Once added, pour in additional rum as needed to maintain the liquid level about 1 inch above the fruit, replace the weight, seal the crock, and return it to its cool, dark resting place.
While there is some flexibility in the amount of sugar used for later additions, don’t skimp too much. The sugar isn’t just there for sweetness – it works together with the rum to help preserve the fruit throughout the season.
Note on Mascarating (mixing the fruit with sugar) before adding to the Rumtopf. Some recipes don’t utilize this extra step and simply add the fruit and sugar to the jar. I find mixing the fruit and sugar and letting it sit before addint to the crock keeps the fruit better preserved with less damage, and very little, if any, stirring is needed when the fruit is added to the jar; usually, only the first layer needs to be stirred.
Should You Stir Rumtopf?
Here, traditional recipes disagree.
Some recommend gently stirring the Rumtopf before adding each new layer of fruit to help distribute the flavors. Others are emphatic that the crock should never be stirred, warning that doing so may damage the fruit.
I found good traditional sources supporting both approaches, so I’ll leave that decision to you. I have tried both methods.
I prefer mixing the fruit and sugar in a bowl and letting it sit, as detailed above. Once the fruit is added to the Rumtopf pot, I do not stir except for the first layer. This ensures no fruit is crushed.
Maturing the Rumtopf
Traditionally, the Rumtopf is ready six weeks after the final fruit is added, just in time for Advent and the Christmas season. If you’d like to follow the traditional schedule, simply look up the date of the First Sunday of Advent each year and count back six weeks. Since Advent doesn’t fall on the same date every year, your timetable may vary by nearly a week.
If you happen to remove a little fruit along the way – for purely scientific quality-control purposes, of course – you can always replace it with another small batch of fruit prepared in the same way.
Caring for Your Rumtopf
Throughout the season:
- Keep the crock tightly covered.
- Store it in a cool, dark place away from open flame.
- Make sure the fruit remains completely submerged.
- Check the rum level occasionally and top it off as needed.
- Watch for signs of fermentation, such as bubbles. If fermentation begins, adding a little higher-proof rum or alcohol will usually suppress it. (More on that below.)
The Type/Kind of Rum to Make German Rumtopf:
Don’t feel like you need an expensive sipping rum for Rumtopf. Once the rum spends months with pounds of fruit and sugar, many of the subtle flavors that make a premium rum special are overwhelmed. A good-quality mixing rum is more than sufficient and is what many liquor professionals recommend. Talk to the staff at your store. They can point you in the right direction, or if they don’t find a staff member who can.
I chose an island rum for my Rumtopf. My reasoning was simple: historically, rum imported into Germany would almost certainly have come from the Caribbean, making it a fitting choice for this traditional recipe. Whether you choose a Caribbean rum or another good-quality dark or amber rum, the goal is a clean, pleasant spirit rather than an expensive one.
Some use spiced rum, although others argue the spices are largely lost once the fruit has aged for several months. The special additions of cinnamon, allspice berries, and clove added towards the end of the season, if used, will spice the Rumtopf beautifully and better than a spiced rum does.
In Austria, many traditional Rumtopf recipes call for Stroh Rum, a strongly flavored Austrian rum available in several different proofs. The commonly cited strength for Stroh in Rumtopf is 54% alcohol by volume (108 proof). I’ve done the math, below, to come up with a mix of more available rums that imitates that proof.
Some regional European variations of Rumtopf include adding a bottle of white wine about a month before serving. I haven’t personally tried this.
Why 108 Proof?
To safely preserve the fruit during the months-long aging process, traditional German and Austrian Rumtopf recipes consistently recommend an alcohol content between 50% and 55% alcohol by volume (100 to 110 proof).
Unfortunately, most rum sold in the United States is only 40% alcohol by volume (80 proof), which is below that traditional recommendation.
You’ll sometimes see modern recipes suggesting that standard 40% (80-proof) rum is sufficient, provided the Rumtopf is checked regularly for signs of fermentation. If bubbles begin to form, they recommend adding a higher-proof alcohol to stop the fermentation.
That approach may work perfectly well for some people, but it isn’t one I recommend. I’ve never found clear guidance on exactly how much higher-proof alcohol should be added once fermentation begins and prefer to avoid the possibility of it happening.
More importantly, in a small test batch I made using lower-proof alcohol, fermentation did occur. The resulting Rumtopf became cloudy, yeasty, and noticeably less pleasant than one made with the recommended proof.
I’d much rather start with the proper proof from the beginning than rely on catching and correcting a problem later. It eliminates much of the guesswork, greatly reduces the chance of fermentation, and allows the Rumtopf to quietly mature for weeks without needing constant attention.
Mixing 108 Proof Rum
If you can’t find a 108-proof rum, it’s easy to make a close approximation.
Mix:
- 2 parts 80-proof rum
- 1 part 151-proof rum
This produces a mixture of approximately 103 proof, well within the recommended range of 100 to 110 proof for Rumtopf.
Both Bacardi 151 (where available) and Goslings Black Seal 151 are good choices to choose for a higher proof rum. Your favorite choice will work for the standard 80 proof. (Bonus: the 80 proof is often less expensive than the higher proofs, saving you a bit of cash.)
Can I Make Rumtopf with Other Alcohols?
While not traditional (clearly, there is Rum in the name), this method can work with other alcohols. You’ll find recipes calling for bourbon, Southern Comfort, or vodka. Ultimately, choose an alcohol whose flavor you enjoy, keeping in mind that you may need to adjust the proof to fall within the recommended range.
If needed, a small amount of Everclear can be used to increase the proof of almost any spirit without contributing much additional flavor. You’ll want to calculate how much Everclear will need to be added to different proofs to bring them to the 50% and 55% alcohol by volume (100 to 110 proof).
How Much Rum Will You Need?
Before you begin, it’s helpful to know approximately how much liquid your crock will hold. The easiest way to find out is to fill it with water, then measure the water.
Because Rumtopf is built gradually over several months and because crocks vary greatly in both shape and size, there’s no exact amount of rum you’ll need. Generally, the wider the crock, the more rum will be needed.
I’ve found that purchasing enough rum to equal about one-quarter of your crock’s liquid capacity is a good starting point. You may need a little more as the season progresses, or you may find yourself with some left over at the end.
Oh dear, what a dilemma.
Bottle Sizes:
It may help to know that liquor is sold in metric bottles. Some bottles include both metric and fluid-ounce measurements on the label, while others list only the metric size.
| Bottle Size | Metric | Approximate U.S. Measure |
|---|---|---|
| Standard Bottle (“A Fifth”) | 750 mL | 25.4 fl oz (about 3⅛ cups) |
| Liter | 1 L | 33.8 fl oz (about 4¼ cups) |
| Handle | 1.75 L | 59.2 fl oz (about 7⅓ cups) |
A standard bottle, often called “a fifth”, is the size you’ll most commonly find on store shelves.
Remember: Overproof rum and other high-proof alcohols are extremely flammable. Handle and store them with appropriate care, and keep them away from open flames or other ignition sources.

If your lid isn’t tight or your container doesn’t have a lid, add a layer of plastic wrap and use a rubber band. If no lid, use foil over the plastic wrap. After you weigh the fruit down.
Monitoring Your Rumtopf:
Rumtopf is wonderfully low-maintenance, but it shouldn’t be forgotten entirely. Every so often, check your crock for the following:
- Make sure all of the fruit remains completely submerged. Any fruit exposed to the air is much more likely to mold.
- Keep the rum level about 1 inch (or two finger widths) above the fruit. Add additional rum as needed.
- Watch for signs of fermentation. Small bubbles are the first indication that fermentation has begun.
- Check for mold. Mold should never develop on properly submerged fruit.
Fermentation
Using the right proof should eliminate any issues with fermentation. If, for some reason, it does occur, it can usually be stopped by adding a higher proof alcohol.
Without a way to measure the resulting alcohol content, however, determining exactly how much to add becomes nothing more than an educated guess.
Mold
If mold develops, it almost always appears on fruit that has risen above the surface of the alcohol.
Because mold can penetrate farther than what is visible, I recommend discarding the entire batch rather than trying to remove only the moldy fruit. Fortunately, maintaining the proper alcohol level and keeping the fruit submerged makes mold extremely unlikely.
How Long Does Rumtopf Keep?
Properly stored in a cool, dark place, Rumtopft will keep for several years. In my opinion, it’s best used before two to three years have passed.
Serving Your German Rumtopf
One of the best things about Rumtopf is its versatility. Both the fruit and the liqueur have dozens of uses.
Keep in mind that the fruit in Rumtopf is heavily infused with alcohol and is often more potent than the liquid itself, even though it may not taste that way. Serve responsibly.
Desserts
Rumtopf is most often served over desserts, including:
- Vanilla ice cream
- Pound cake
- Angel food cake
- Cheesecake
- Bread pudding
- Panna cotta
- Bavarian cream
- Flan
- Vanilla pudding or custard
- Ricotta cheese
Finish with whipped cream, crème fraîche, or even sour cream for a traditional touch.
The fruit is also wonderful spooned into baked apples.
If you’d like a sauce, strain a little of the Rumtopf liqueur, dilute it slightly with water, and thicken it with a little cornstarch.
Breakfast & Brunch
Rumtopf fruit makes an indulgent topping for:
- Pancakes
- Waffles
- Crêpes
- French toast
Top with whipped cream for breakfast – or ice cream if breakfast has turned into dessert!
Drinks
Don’t overlook the liqueur. It’s the best part of the Rumtopf.
Enjoy it as an after-dinner cordial or try it:
- Topped with Champagne or sparkling wine
- Mixed with sparkling water
- Added to a glass of white wine
- As a flavorful addition to cocktails
A piece of the fruit makes a beautiful garnish.
Savory Dishes
Rumtopf isn’t just for sweets.
The liqueur makes an excellent glaze or finishing sauce for:
- Ham
- Pork
- Beef
- Lamb
- Venison and other game meats
Begin basting about halfway through cooking so the sugars have time to caramelize into a beautiful glaze.
Gifts
Rumtopf makes a memorable homemade gift.
Ladle the fruit and liqueur into attractive jars, add a festive label, and pair it with pound cake, angel food cake, or other treats for a wonderful holiday gift.
…if you can bear to part with it!
About This Guide on Making German Rumtopf:
Originally published in 2018, this guide was developed over almost a decade of research, making multiple batches of German Rumtopf, reading traditional German sources (using translation where needed), and comparing modern and historical methods.
I’ve taste-tested and learned along the way and loved every minute of it!
If you’d like to chat about my Complete Guide to Traditional German Rumtopf, leave a comment! I would like nothing more than to hear about your variations and compare notes or answer any questions you might have. I answer each and every comment on my site.
Mollie
PrintThe Complete Guide to Traditional German Rumtopf

- Category: Beverages
- Cuisine: German
Ingredients
This recipe outlines a Traditional Rumtopf. Refer to the Post on Rumtopf for the specifics.
Wash and dry all fruit before preparing. Fruit should be added as each comes into season
- 1 pound (16 ounces) strawberries, hulled, leave whole unless large
- 1 pound (about 2 1/4 cups) granulated, brown sugar, or a combination
- 1 pound (16 ounces) cherries, stems removed, pitting optional, pricked several times with a sharp object if not pitted
- 1/2 to 1 pound (1 1/8 cup to 2 1/4 cups) granulated, brown sugar, or a combination
- 1 pound (16 ounces) peaches, peel if desired, remove pits, cut into bite-sized slices or pieces
- Repeat with the same amount of sugar as used for cherries
- 1 pound (16 ounces) apricots, peeled if desired, remove pits, cut into bite-sized pieces
- Repeat with the same amount of sugar as used for cherries
- 1 pound (16 ounces) pears, peel, core, and cut into bite-sized pieces
- Repeat with the same amount of sugar as used for cherries
- 1 pound (16 ounces) grapes, pricked several times with a sharp object
- Repeat with the same amount of sugar as used for cherries
- 1/2 (8 ounces) pineapple, bite-sized pieces (fresh preferred, canned is fine)
- 1/4 to 1/2 pound (1/2 cup to 1 1/8 cups) granulated, brown sugar, or a combination
- 100 to 110 proof rum to cover each layer of fruit
- Special additions: orange peels, cinnamon, clove, allspice berries, and raisins as desired. (See the post)
Instructions
For the first prepared fruit, strawberries, add to a bowl, cover with the directed sugar, gently mix, and set aside for about three hours. Add to crock. Cover with rum by 1″. Cover with a small saucer, plate, or Ziploc-type bag 1/2 filled with water to keep the fruit submerged. Add lid and set aside in a cool, dark space with no exposed flame until it is time to add the next fruit.
Repeat the process with subsequent fruits, noting that the sugar may be the same amount as the strawberries or reduced by half. Again, add to the crock, cover with the rum, weigh down the fruit, and set aside as directed.
When adding pineapple, note that the amount of the fruit and sugar is reduced. Again, repeat the processes described.
Add the orange peel, spices, and raisins if using, at the same time as the pineapple.
Note: Traditionally, the last fruit, the pineapple, is added around mid-October along with the special additions chosen. The crock then sits until the first day of Advent, around the last week of November. This gives it about 6 weeks to mature. Do monitor it from time to time during this period.
Stored properly, in a dark, cool place, Rumtopf will be perfectly fine for years.

Pingback: Waffles with Rumtopf Topping - Farm to Jar Food