Halloween’s over, and if you live in the US, it’s time to start thinking about Thanksgiving. And that means Pumpkin Pie. I get excited about Pumpkin Pies because I usually only make them once a year. They’re always scratch-made, and sometimes they’re made with my Easy Homemade Pumpkin Puree.

One way to up your game in any pumpkin dessert is to make your pumpkin puree. And it’s drop-dead simple. Of course, everyone has their tricks and tips, so I’ll show you mine. First, let’s talk about the canned stuff.

Easy Homemade Pumpkin Puree
About Canned Pumpkin Puree:
Of all the convenience canned products one of the best is pumpkin puree. When I say pumpkin puree, I mean pumpkin puree not pumpkin pie filling or mix, which will be very close to the pumpkin puree at your store.
The pumpkin pie filling or mix will have spices and other ingredients while the puree, depending on the brand, will have pumpkin or a mix of pumpkin and squash. Libby’s is made from one type of pumpkin, the Dickinson pumpkin.
When I buy pumpkin puree, I pick it up during the Holiday sales & watch for it at a deep discount after the holidays. I shove it in the back corner of my pantry and age it before using it. My sister-in-law swears canned pumpkin puree tastes best after a year or two, and I agree. I think with time, the natural sugars change & the puree mellows, but I’m no scientist.
But enough of canned pumpkin puree – let’s get back to my Easy Homemade Pumpkin Puree.

Libby’s Pumpkin Puree & Libby’s Pumpkin Pie Mix, from their website, links above in the text
About Homemade Pumpkin Puree:
When a special holiday like Thanksgiving rolls around it might not sound feasible to make pumpkin puree, but it’s so low effort that it’s no big whup to whip up your own. Try it once and you’ll be a pumpkin puree-making fool. Just think of the street cred!
Some cooks swear by canned; they’re looking for absolute consistency of texture and taste from year to year. We’ll work around that. I grew up in a small farm town, so have had pumpkin pies made with both. It was my (ex) Mother-in-law who convinced her pies made with homemade puree had more pumpkin flavor and a fresher taste.
I’m about the same age now as she was when I first had her pumpkin pie! Time flies – that was almost 30 years ago! I’ve thrown down a lot of pies since and try to make a new one (along with Pam Anderson’s Pumpkin Pie every year.) The little video, below, has some of our fave Thanksgiving Desserts.
Picking the Pumpkin:
Special varieties of pumpkins, called sugar pumpkins, sweet pumpkins, or pie pumpkins are used for pies. They’re a whole different animal than our large Jack-O’-Lantern pumpkins. Read more on Wikipedia. You might be inspired to make more than just pie!
Sugar pumpkins are small, about 8 to 12 inches, about three to eight pounds, and the flesh is thick and dense. They’re bred for flavor, and the flesh is finer and less fibrous than other pumpkins.
Pick up a few sugar pumpkins when you see them – you can decorate with them for autumn or Halloween. Just don’t cut into them and they can be cooked with later – keep an eye on them and make sure they’re not getting soft.

The Best Roasted Pumpkin Seeds
Roasting the Seeds:
I wish I would have more time to roast pumpkin seeds with my kids. Around Halloween was always so busy. My recipe brines them. It adds so much flavor and the seeds can keep in the brine for a few days until it’s convenient to roast.
If you’d like to make them right away, though, they can be roasted right along with your pumpkin. See My Best Roasted Pumpkin Seeds.

The Best Roasted Pumpkin Seeds and pumpkin scraped for roasting.
Roasting the Pumpkin:
Roasting is straightforward. Rinse the pumpkin – no need for heroics, but you don’t want dirt falling on the flesh. Preheat the oven to 350 degrees F, break off the stem, cut the pumpkin in half. Don’t worry about trimming the stem area, it will just pop right off after the pumpkin is roasted.
Scoop out the seeds (an old-fashioned ice cream scoop works great) and scrape any loose fibers from the flesh. It might seem like a waste, but they won’t improve your puree. Place your pumpkin, cut side down on a foil sheet for easy cleanup, and roast until the skin is slightly darkened and the flesh is very soft. Test by piercing it with a knife. Depending on the size, it will take about 45 minutes to an hour.
Don’t worry about losing juices and flavor by roasting cut side down; it doesn’t seem to matter. The pumpkin roasts and steams and makes a puree with a beautiful texture that’s not too, too wet. Some people roast their pumpkin cut side up, but the edges get dry and dark and it needs to be covered with foil, which is a waste.

Chance & the Pumpkin
Other Ways to Cook the Pumpkin:
Several other ways to cook your pumpkin for puree are boiling, steaming, or pressure cooking. I did try pressure cooking. The time savings were negligible, the pumpkin had to be cut in pieces (that’s some work) and the puree was so wet it had to be strained forever. I tested both the pot-in-pot method as well as using a rack.
A fellow blogger, Judi, from Cooking with Aunt Juju has used the microwave and has a post on Cooking with Fresh Pumpkin.
-

- Chocolate Dipped Halloween Spiders with Sugar Pumpkins
-

- Pumpkins ready to go in oven for Easy Homemade Pumpkin Puree
-

- Pumpkins for Easy Homemade Pumpkin Puree, roasted
-

- Easy Homemade Pumpkin Puree, roasted
-

- Peeling the skin on Easy Homemade Pumpkin Puree
-

- A quick chop at right angles to the way the fibers run
How to Mash Easy Homemade Pumpkin Puree:
Once your pumpkin is roasted, peel off the skin. It should lift off with no resistance. If there is any discoloration from cuts or bruises trim it away. If there’s a hard area around the stem, just pull it off.
Next, cut the cooked pumpkin. Look at the pumpkin and you’ll see long fibers running from pole to pole (the top to the bottom. Lay the pumpkin out and chop across those fibers. That 30-second step is going to help you get the smoothest puree.
To turn into puree, mash, toss in the food processor, or work through a ricer or food mill. My favorite is the food processor, but don’t worry if you don’t have any of these specialty tools – people have been mashing pumpkins for centuries without them. A plain old potato masher or a fork can do the job.
Some more notes on mashing:
- If you’re in a hurry, hand mash. One of those old-fashioned mashers with holes (sometimes they’re called waffle-head mashers) is helpful.
- The food processor works well with little physical effort, and makes a beautiful puree, but it’s messy.
- If you have one and a lot of patience (it always looks easy on TV) use a food mill for the silkiest pumpkin puree. Work it in one direction to puree, then turn it back to clean it off, add more pumpkin, and repeat.
- I’ve used a ricer before – it’s a thankless task and messy, but just like the food mill, will give you a gorgeous puree.
Adjusting for Homemade Pumpkin Puree:
Most recipes call for a can of puree, about 1 1/2 cups. If your pumpkin puree is wetter and less dense than the canned, it can throw off a recipe. The puree will need to be strained to remove any excess moisture.
- Place your puree in a lined strainer (in the fridge) and strain for about an hour an hour or so.
- If you want to be exact, strain to the point that 1 1/2 cups of the puree weighs 15 ounces.

Helpful tools to make Easy Homemade Pumpkin Puree – in a pinch a fork will work!
Easy Homemade Pumpkin Puree- Food Safety & Storage:
Any time you’re working with thick, dense food, food safety needs to be kept in mind and this is no exception.
- Keep the two-hour safety window in mind while working with the cooked pumpkin.
- Make sure tools and hands are clean.
- To store, refrigerate promptly in useable amounts. Large amounts won’t chill fast enough to be safe.
- Use Easy Homemade Pumpkin Puree within a few days or freeze.
Prevent Waste:
Decorating with sugar pumpkins and using them later will leep some pumpkins out of the landfill, and making your puree will save a few cans. Using the seeds is a small thing but every bit helps.
Once the puree is portioned out (1 1/2 cups is a great size) it’s pretty safe to say there will be odd amounts left over.
- For small amounts, try freezing in ice cube trays and making my Pumpkin Spice Lattes; they use three tablespoons of puree.
- My Healthier Pumpkin Spice Muffins use one cup.
Preserving:
I like to use my puree promptly, but freezing works. Ziploc bags take up little room and can be stacked easily. Thaw in the fridge in another container in case of leaking. Don’t forget to label and date.
Do not attempt to can pumpkin puree, although the pumpkin itself can be pressure canned. For questions about canning or preserving, visit the National Center for Home Preservation. They are thorough!

Easy Homemade Pumpkin Puree ready for the freezer
Saving Money on Easy Homemade Pumpkin Puree:
It’s hard to definitively hard to say which is cheaper, making your own or buying. There are variables: the size and cost of the pumpkin is once but the price for canned varies. Surprisingly, running an oven is about 1 1/2 cents an hour.
The last can of puree I bought was 99 cents on sale, but I’m a stellar shopper. The 3-pound 10-ounce sugar pumpkin was $1.79. It yielded 1 pound 12 ounces of finished puree. Adjusting for the amount, it was the equivalent of 95 cents for a can’s worth. The larger ones were the same price so obviously were a better value; it’s a good rule of thumb when buying items priced per unit, to buy the largest.
The cheapest option is to grow your own and it’s worth noting sugar pumpkins take up a good bit of space in a garden but not nearly the space larger decorative pumpkins do. Check the farmer’s markets and stands and watch for sporadic sales at the grocery. Now and then Aldi or Lidl will carry them.

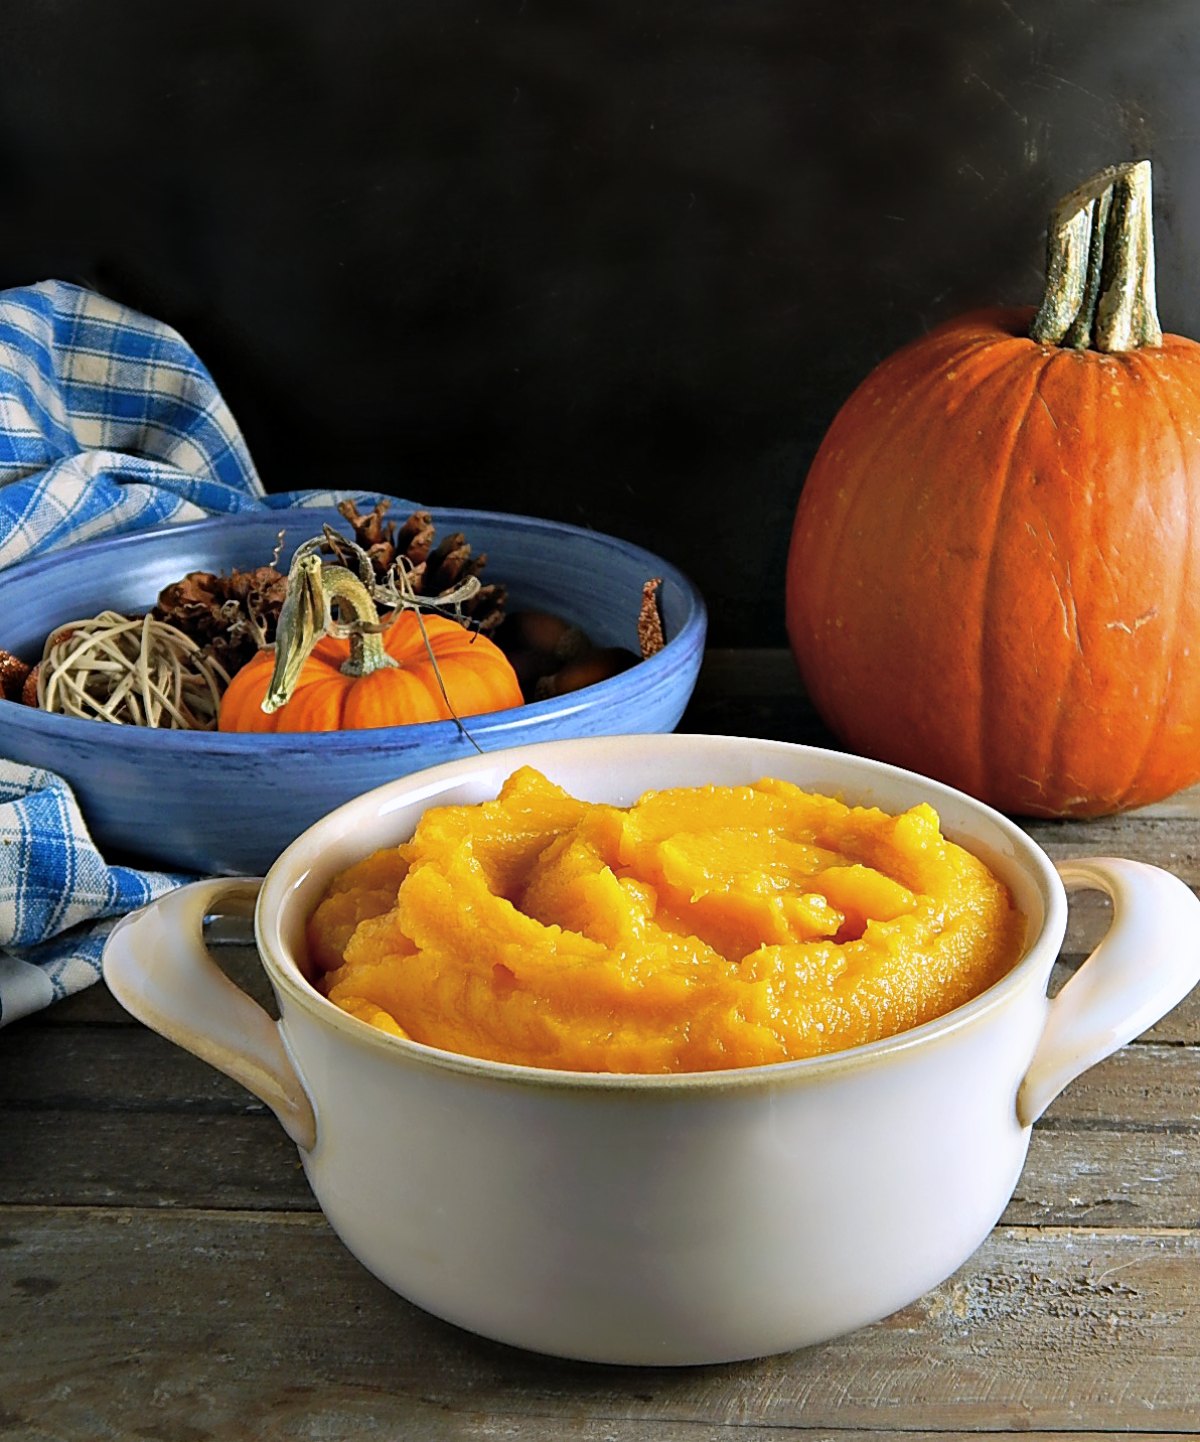
Easy Homemade Pumpkin Puree with a sugar pumpkin, background, right.
Easy Homemade Pumpkin Puree

- Prep Time: 1 hour 20 minutes
- Total Time: 1 hour 20 minutes
- Yield: varies, about 1 1/2 to 2 pounds
- Category: Preserving
- Cuisine: American
Ingredients
- 1 sugar pumpkin, washed, cut in half and deseeded
Instructions
Preheat oven to 350 degrees F. Line a sheet tray with foil for easy cleanup. Place pumpkin, cut side down, and roast for 45 to 50 minutes or until very tender when pierced with a fork.
When finished, remove the skin and trim any discolored areas. Remove the hard part where the stem was. Slice flesh thinly at right angles to the fibers. Puree using a fork, masher, food processor, food mill, or ricer.
If very wet, strain in a paper towel-lined sieve. Refrigerate promptly. Use within four to five days or freeze.
 ——————————-
I’m sharing Easy Homemade Pumpkin Puree at Fiesta Friday #248 cohosted by Judi @ cookingwithauntjuju.com and Alex @ Turks Who Eat.
16 thoughts on “Easy Homemade Pumpkin Puree”